

Help center
Organize an album into sections
Split an album into stages or moments, like Swim, Bike and Run, so buyers who browse by hand jump straight to the right part. How to create sections, fill them and what buyers see.
In short
Sections split one album into parts: the stages of a triathlon, the start and the finish of a race, the ceremony and the party of an event. Buyers still get the whole album and every search, plus a row of section cards to jump straight to the part they care about.
It is still one album with one price, one link and one set of discounts. Sections only change how photos are organized and browsed.
When to use sections
Sections help most when:
- The event has clear stages. Triathlon (Swim, Bike, Run), duathlon, relays, multi-day events (Day 1, Day 2).
- Photos come from different spots on the course. Start, Kilometer 5, Finish line.
- Buyers look for themselves by hand. Face and bib search do not catch every photo (goggles, caps, hidden bibs). Someone who knows they swam at 7:10 can open Swim and scroll a few hundred photos instead of thousands.
For a short race shot from a single spot, a plain album is usually enough.
Create sections
-
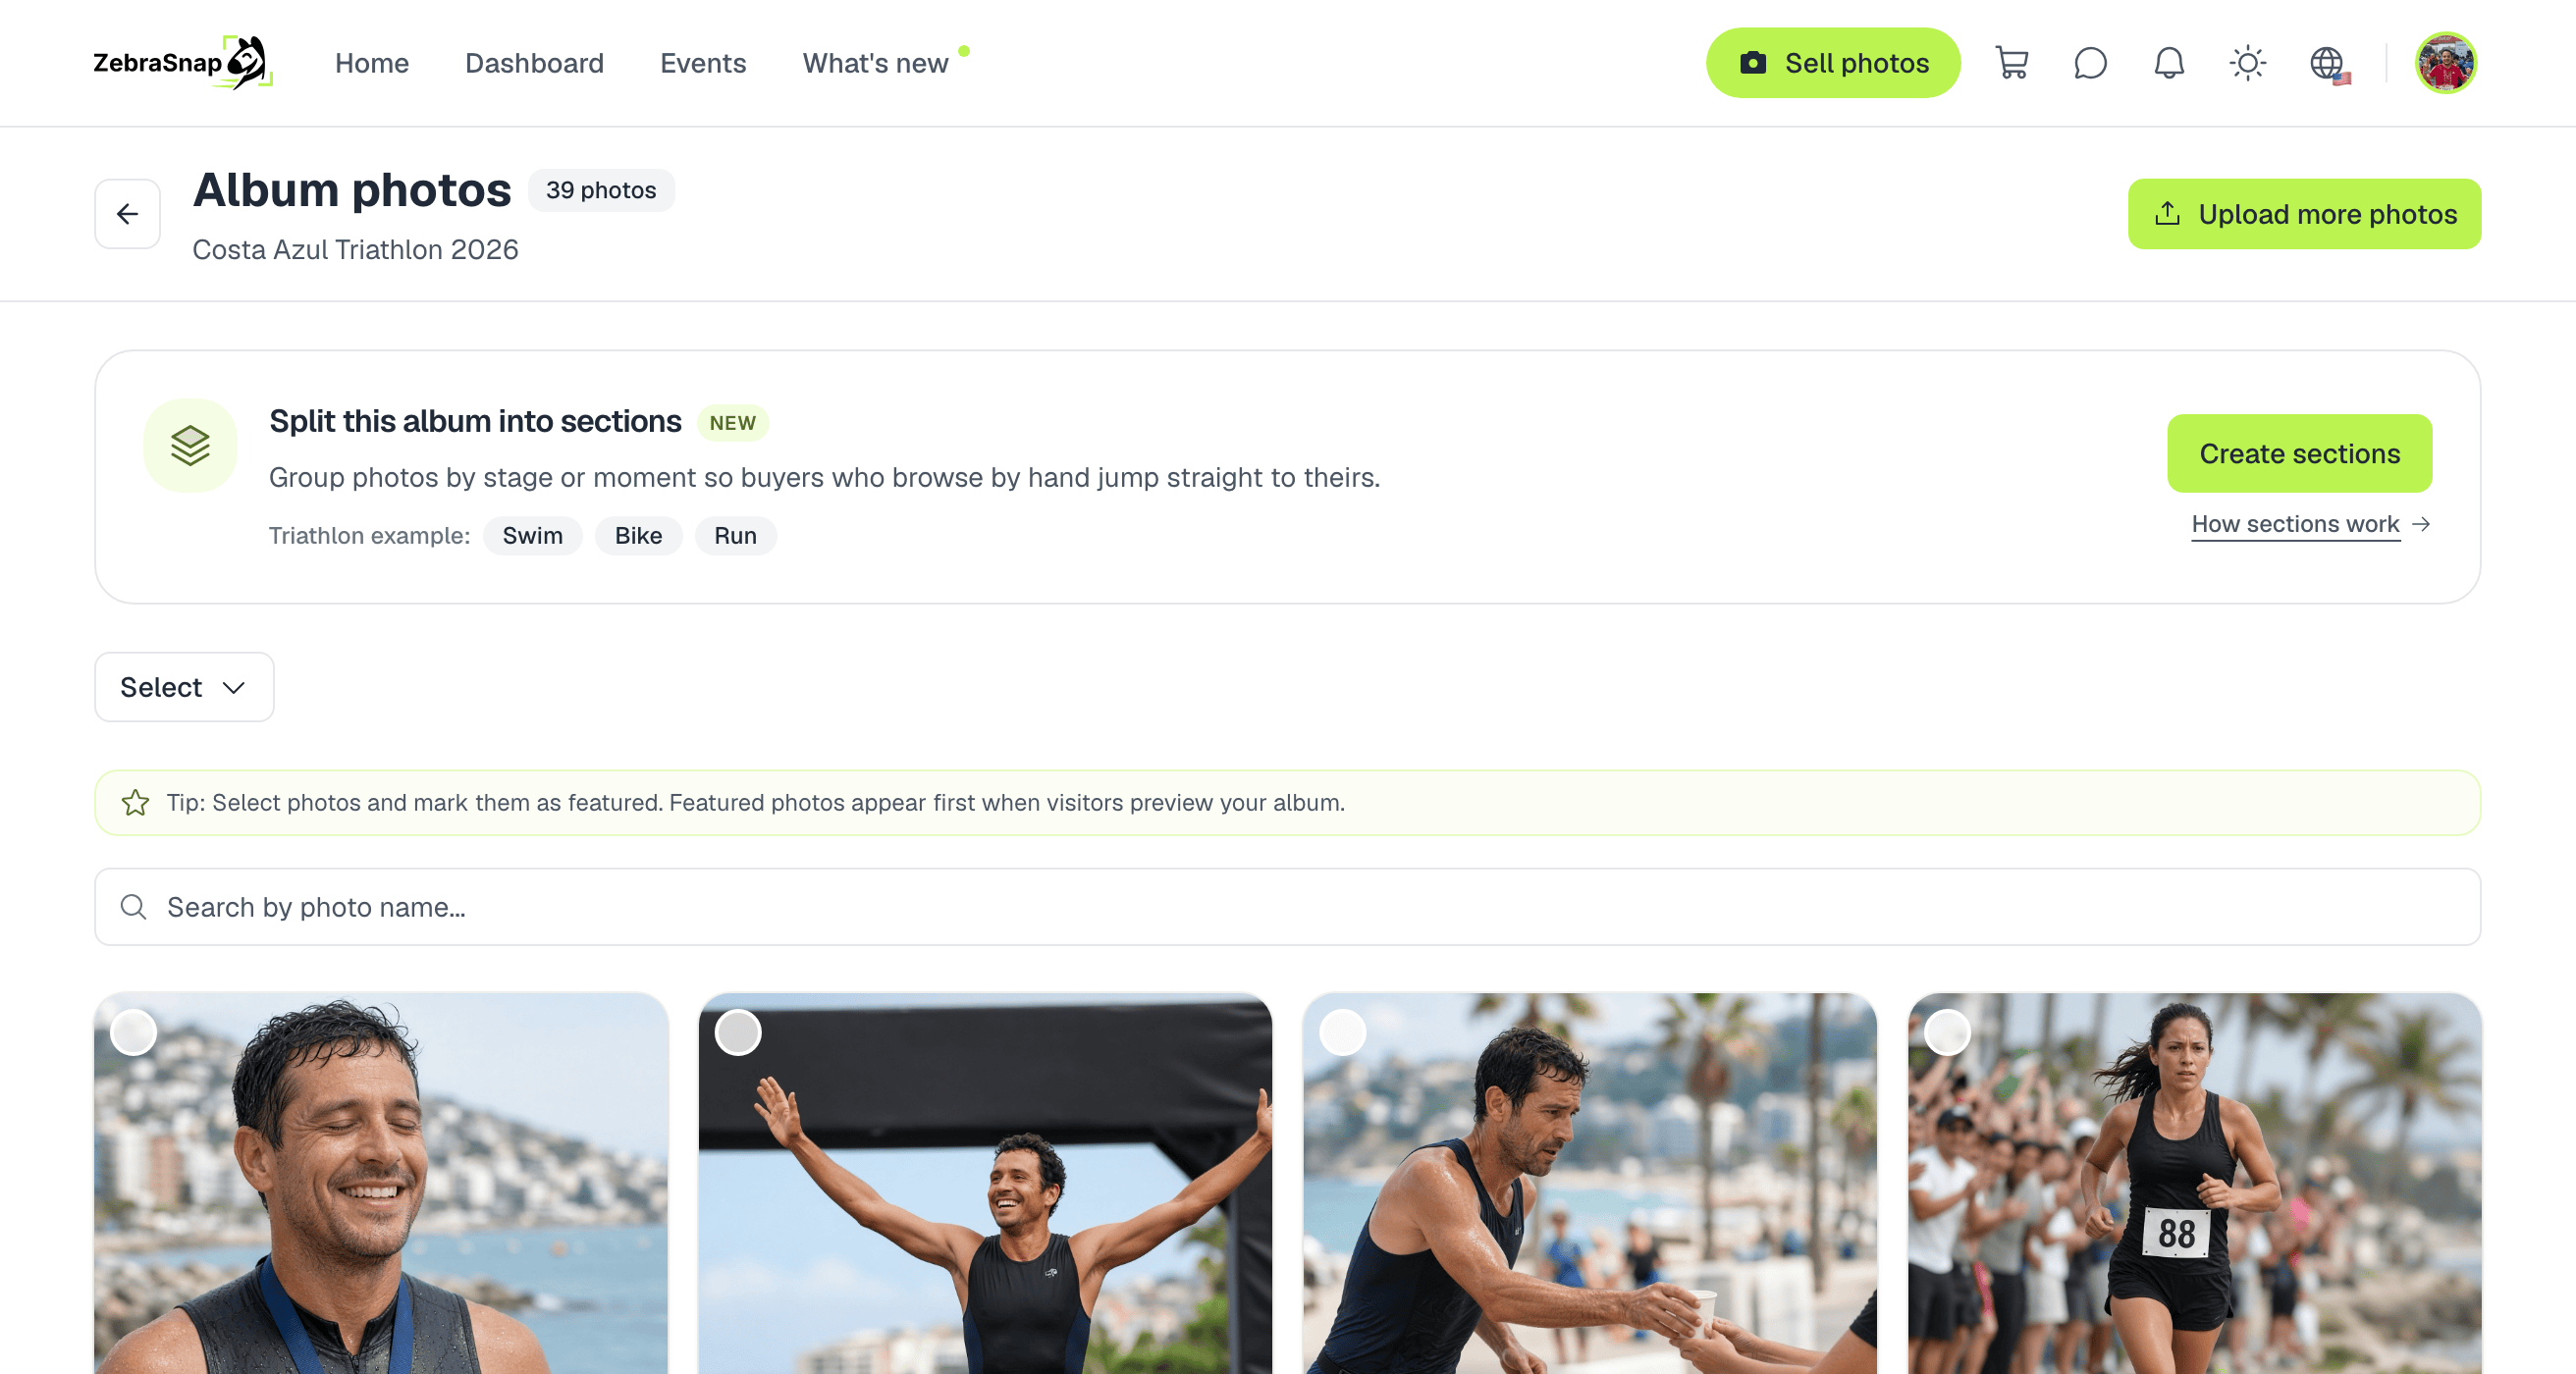
Open your album and go to Photos (View all). If the album has no sections yet you'll see an explanation card: press Create sections.
-
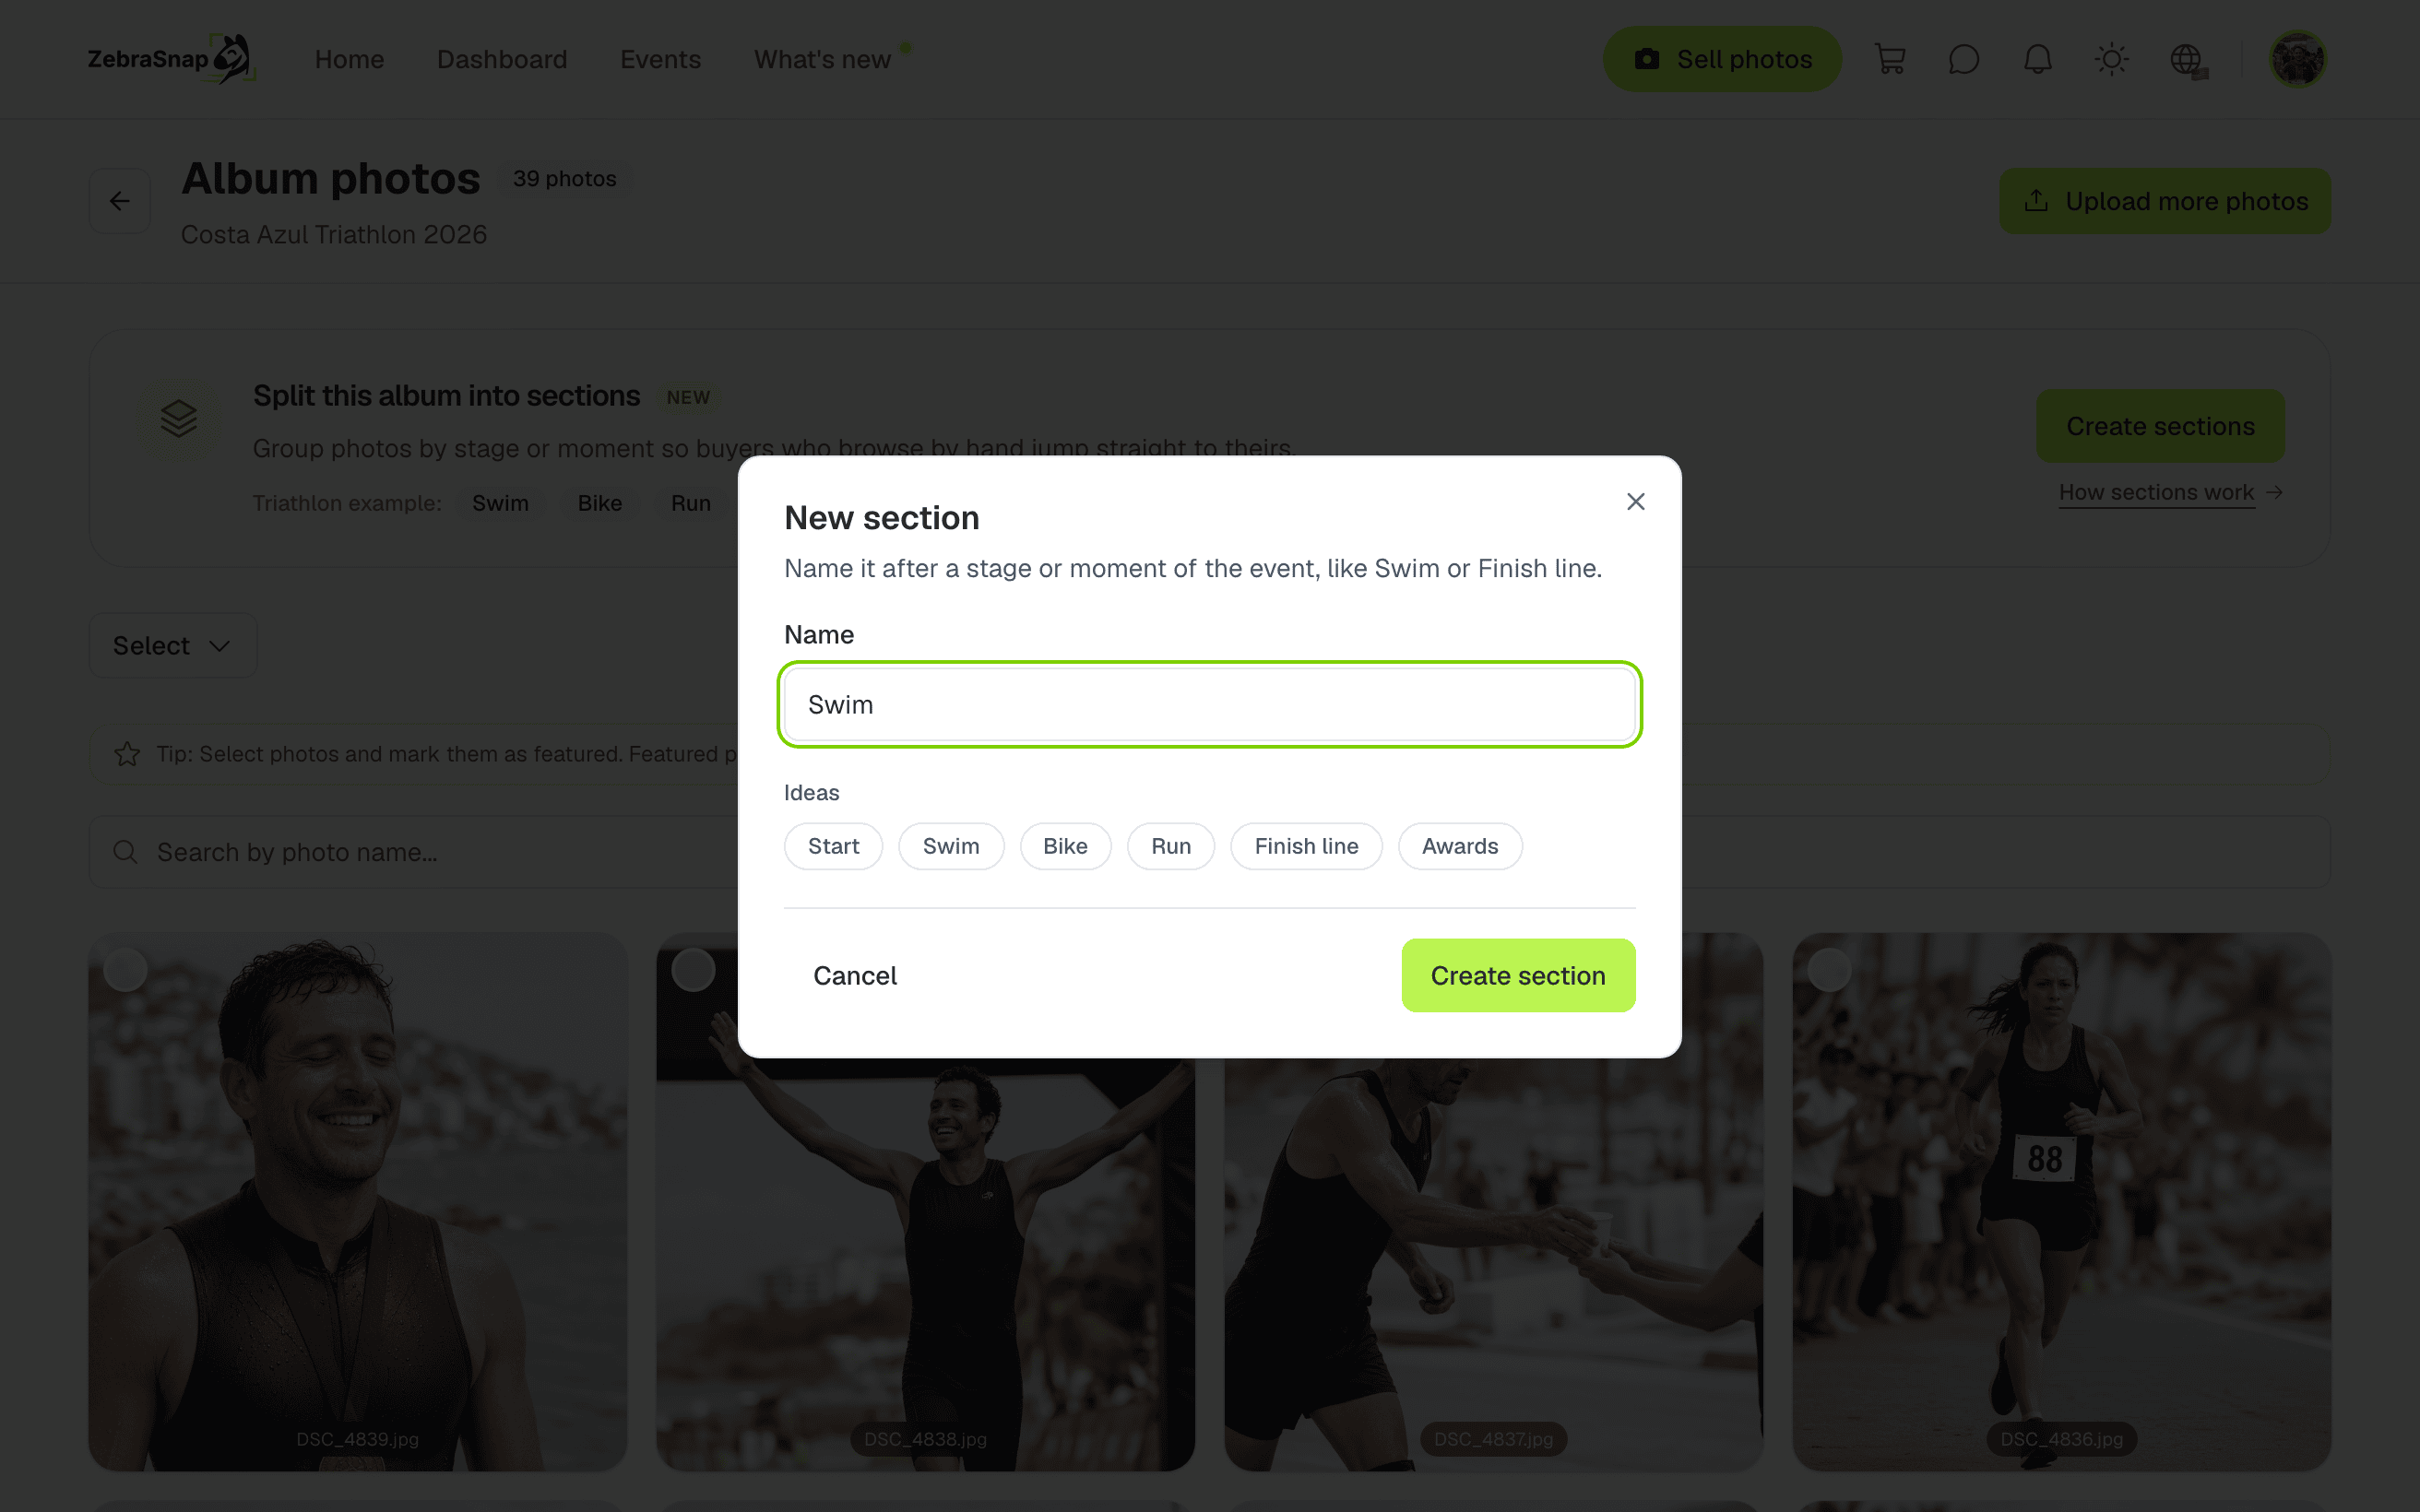
Give the section a name. The ideas under the field (Start, Swim, Bike, Run, Finish line, Awards) fill it in with one click.
-
Repeat for every part of the event. Sections appear in a bar above your photos, in the order buyers will see them.
An album can have up to 30 sections.
Put photos in a section
There are two ways, and they work together.
While uploading (web). On the upload page, pick the section under Upload to section before adding files. Each file goes to the section that was selected when you added it, so you can drop the Swim folder, switch to Bike, and drop the next folder.
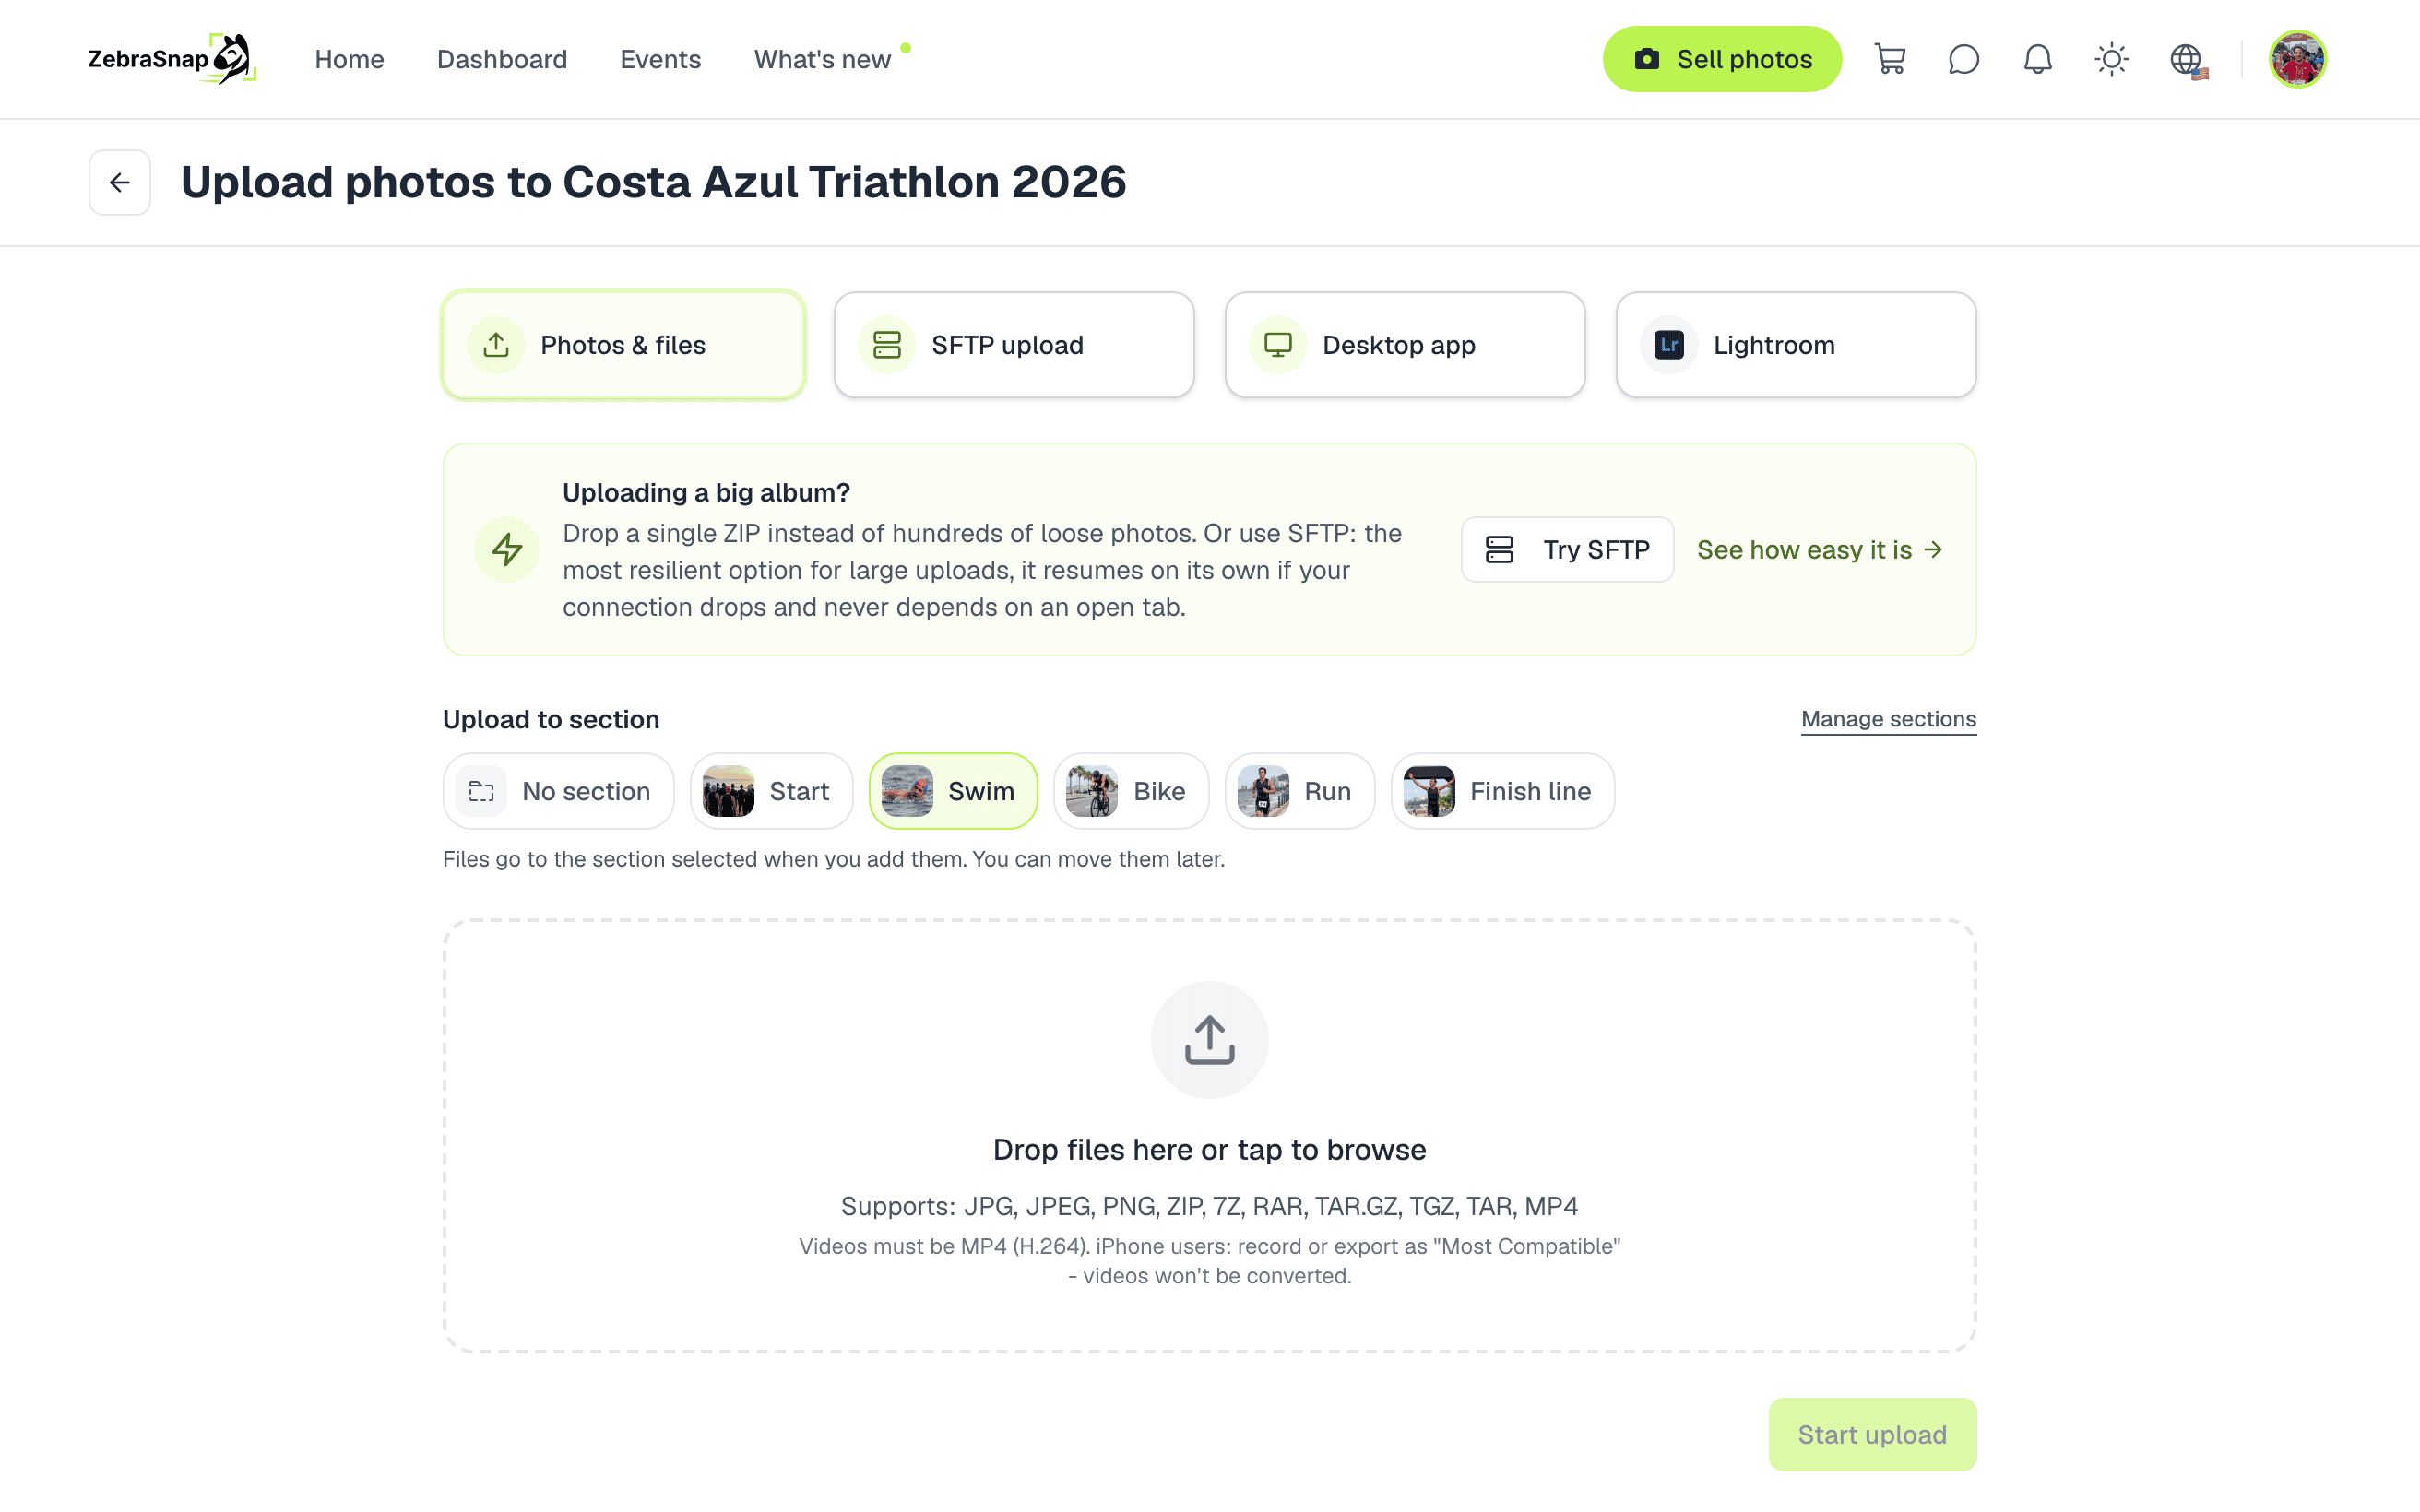
Photos uploaded with SFTP, the desktop app or Lightroom arrive under Unsorted. Move them afterwards as shown below.
After uploading. On the photos page:
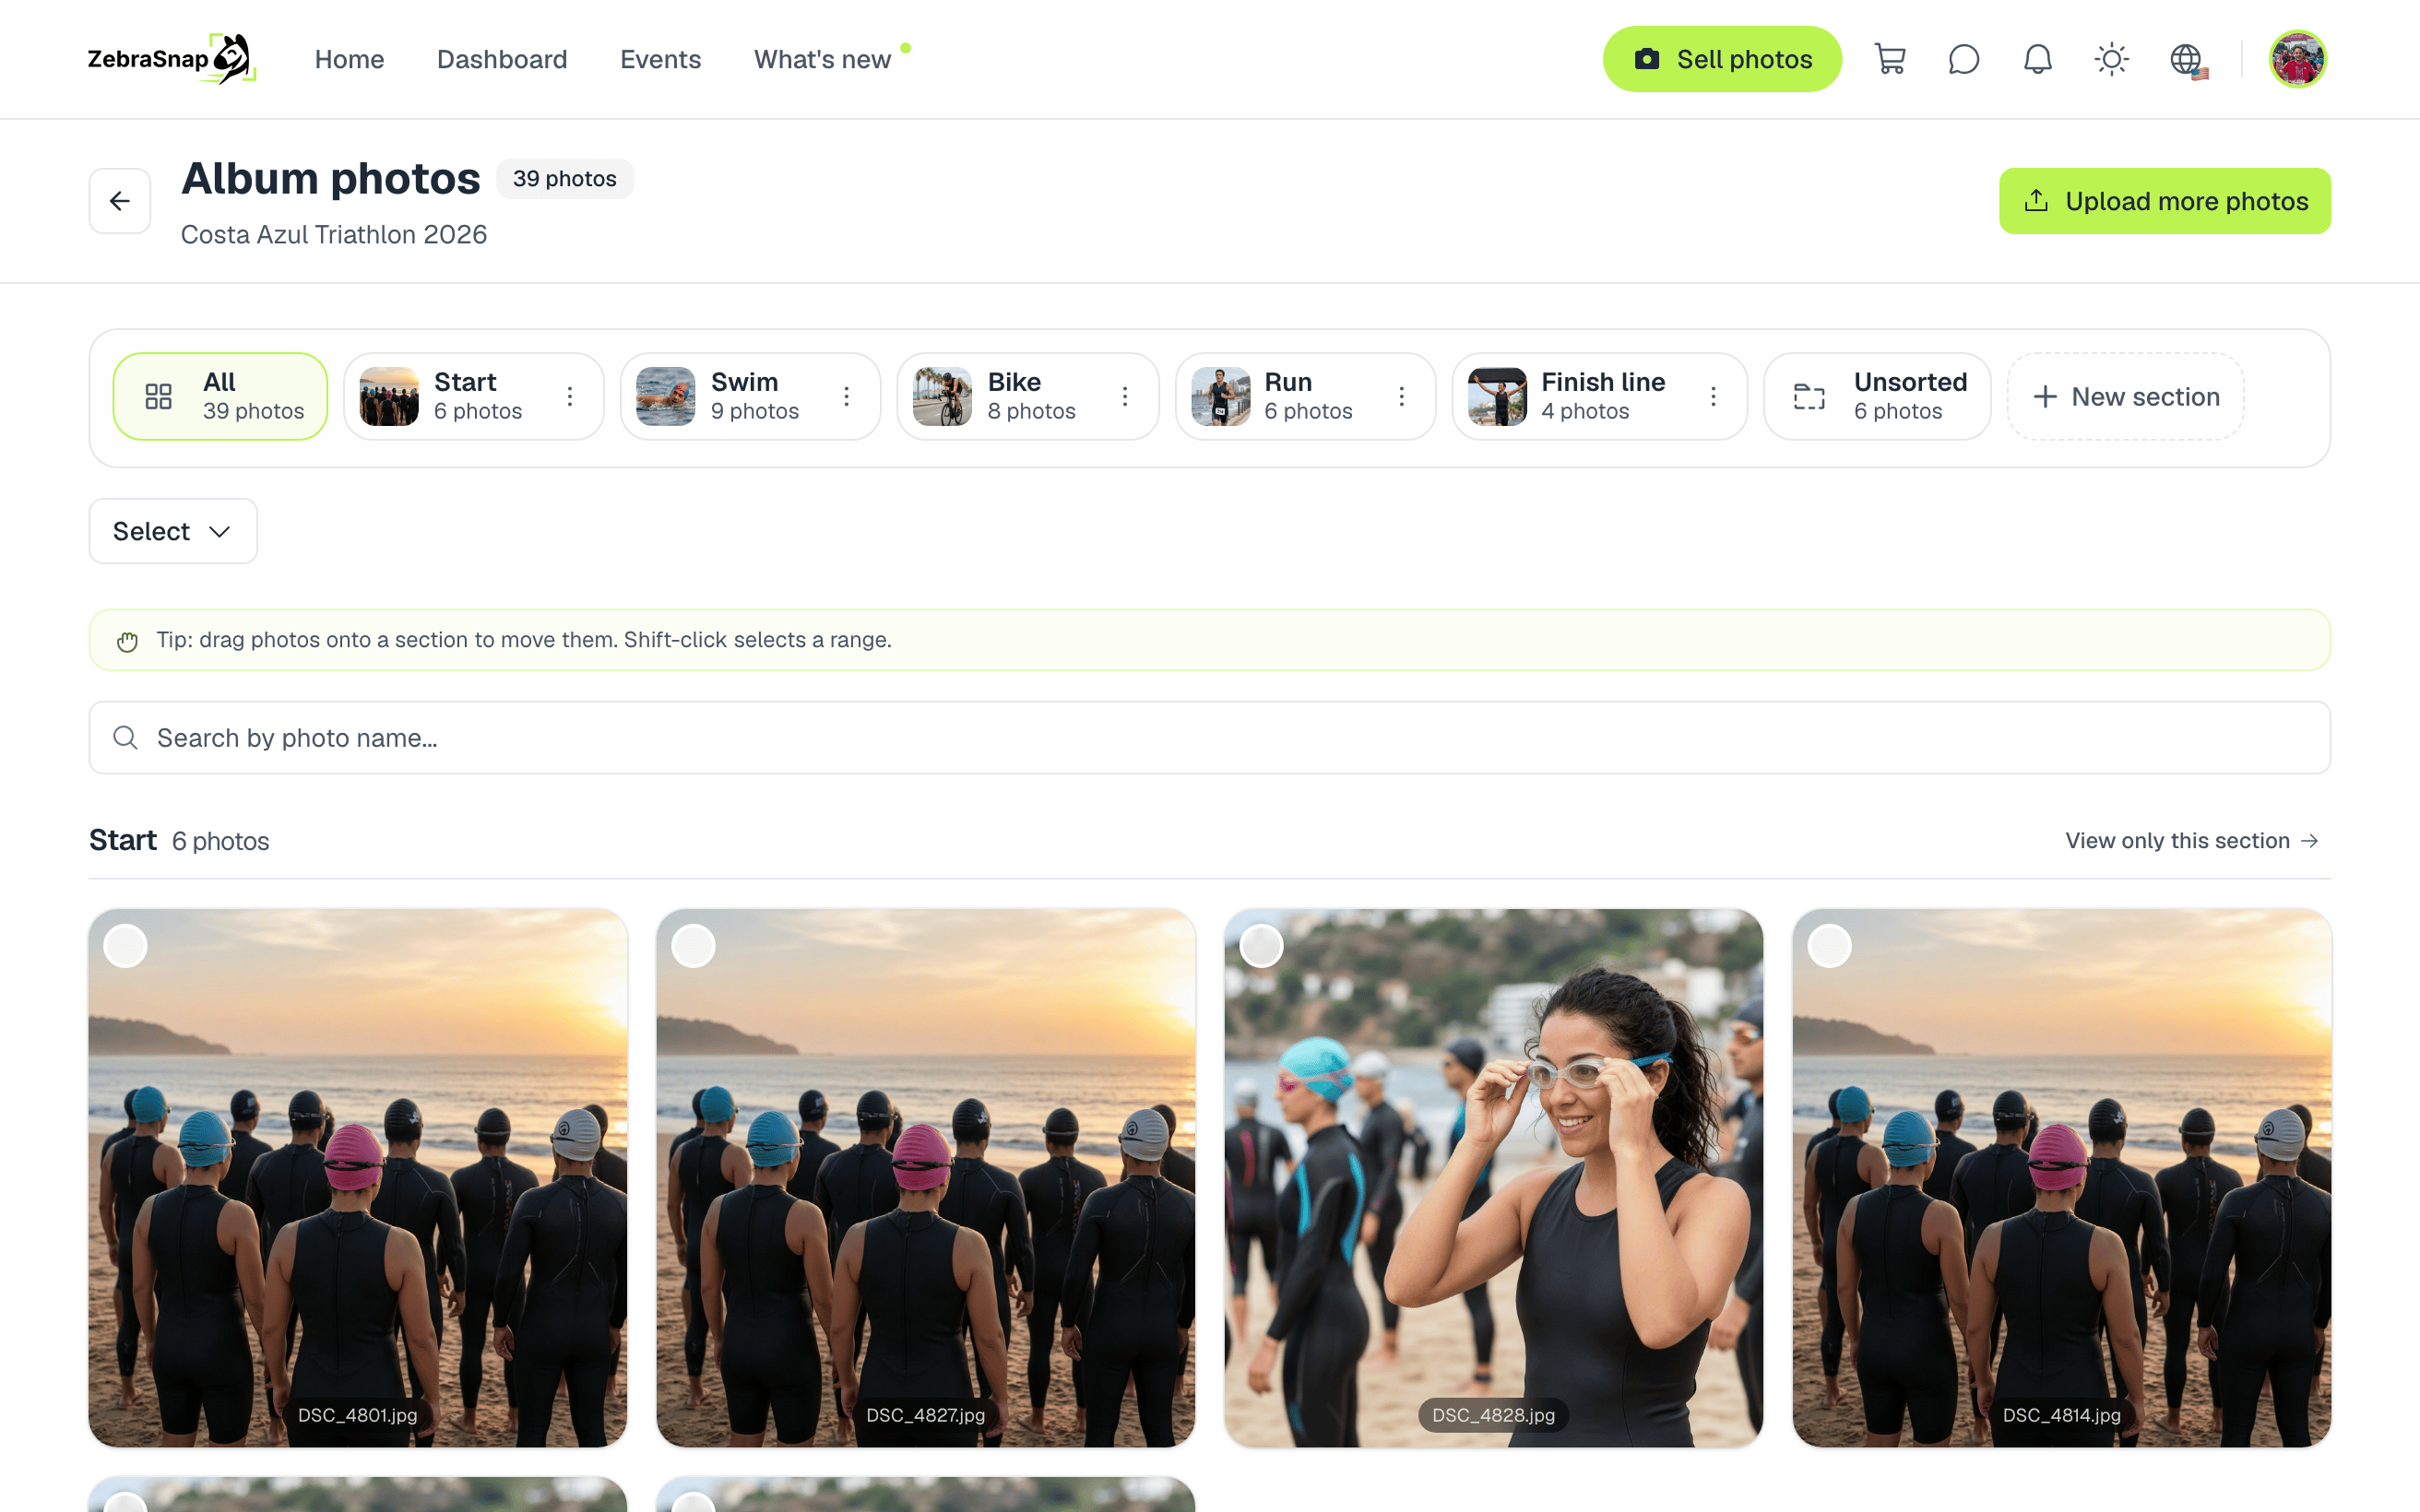
- Drag and drop. Drag a photo onto a section in the bar. If the photo is selected, all selected photos move with it. The section lights up when you can drop.
- Select and move. Select photos (Shift-click selects a whole range, and Select at the top can pick every photo in the current view), then press Move to section and pick the section. You can also create a new section from that menu and move the photos into it in one step.
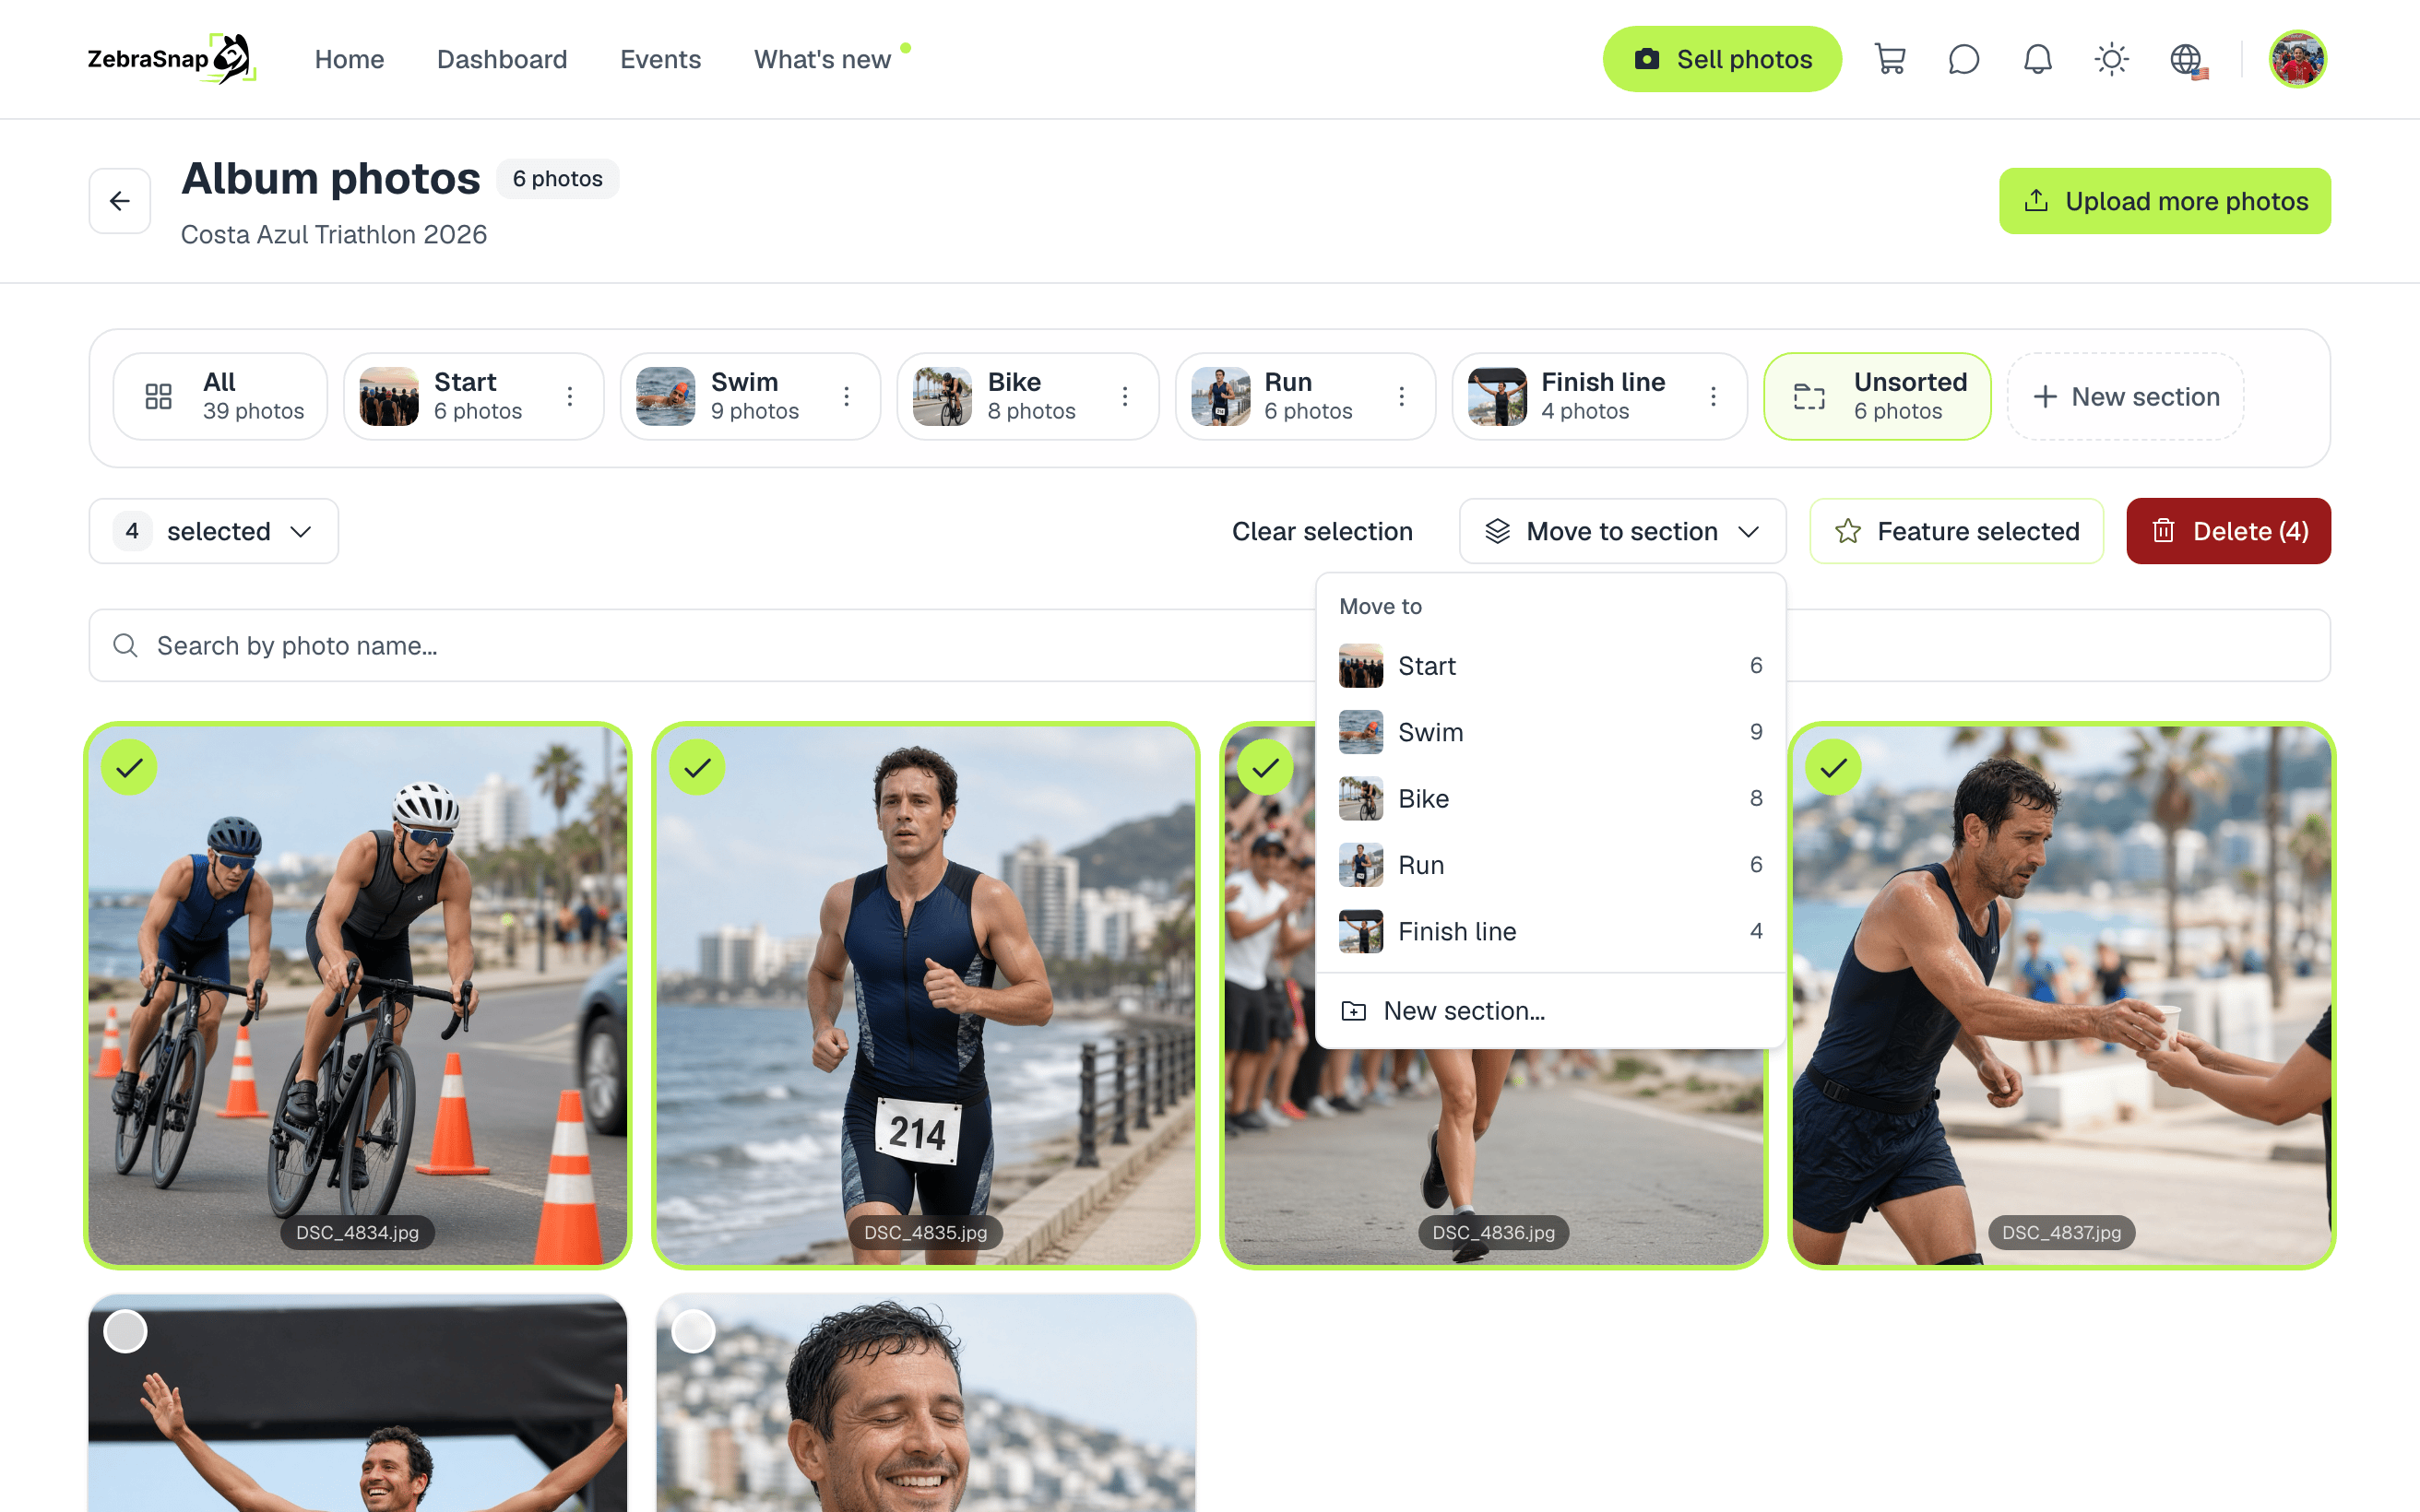
After each move a message tells you how many photos moved, with an Undo button in case you dropped them in the wrong place.
The bar above your photos also works as a filter: All, each section, and Unsorted (photos not in any section yet). Open Unsorted to see what is left to organize.
Manage sections
Use the three-dot menu on any section to:
- Rename it.
- Change cover: pick the photo buyers see on the section card. Until you pick one, the first photo of the section is used (featured photos first).
- Move earlier / Move later to change the order. On a computer you can also drag the section in the bar.
- Delete section. Its photos are not deleted: they stay in the album under Unsorted.
What buyers see
When an album has sections, buyers see a Browse by section row with a card for each section: its cover, its name and how many photos it has. Opening a section shows only those photos, and they can still search by face, bib number or color inside it.
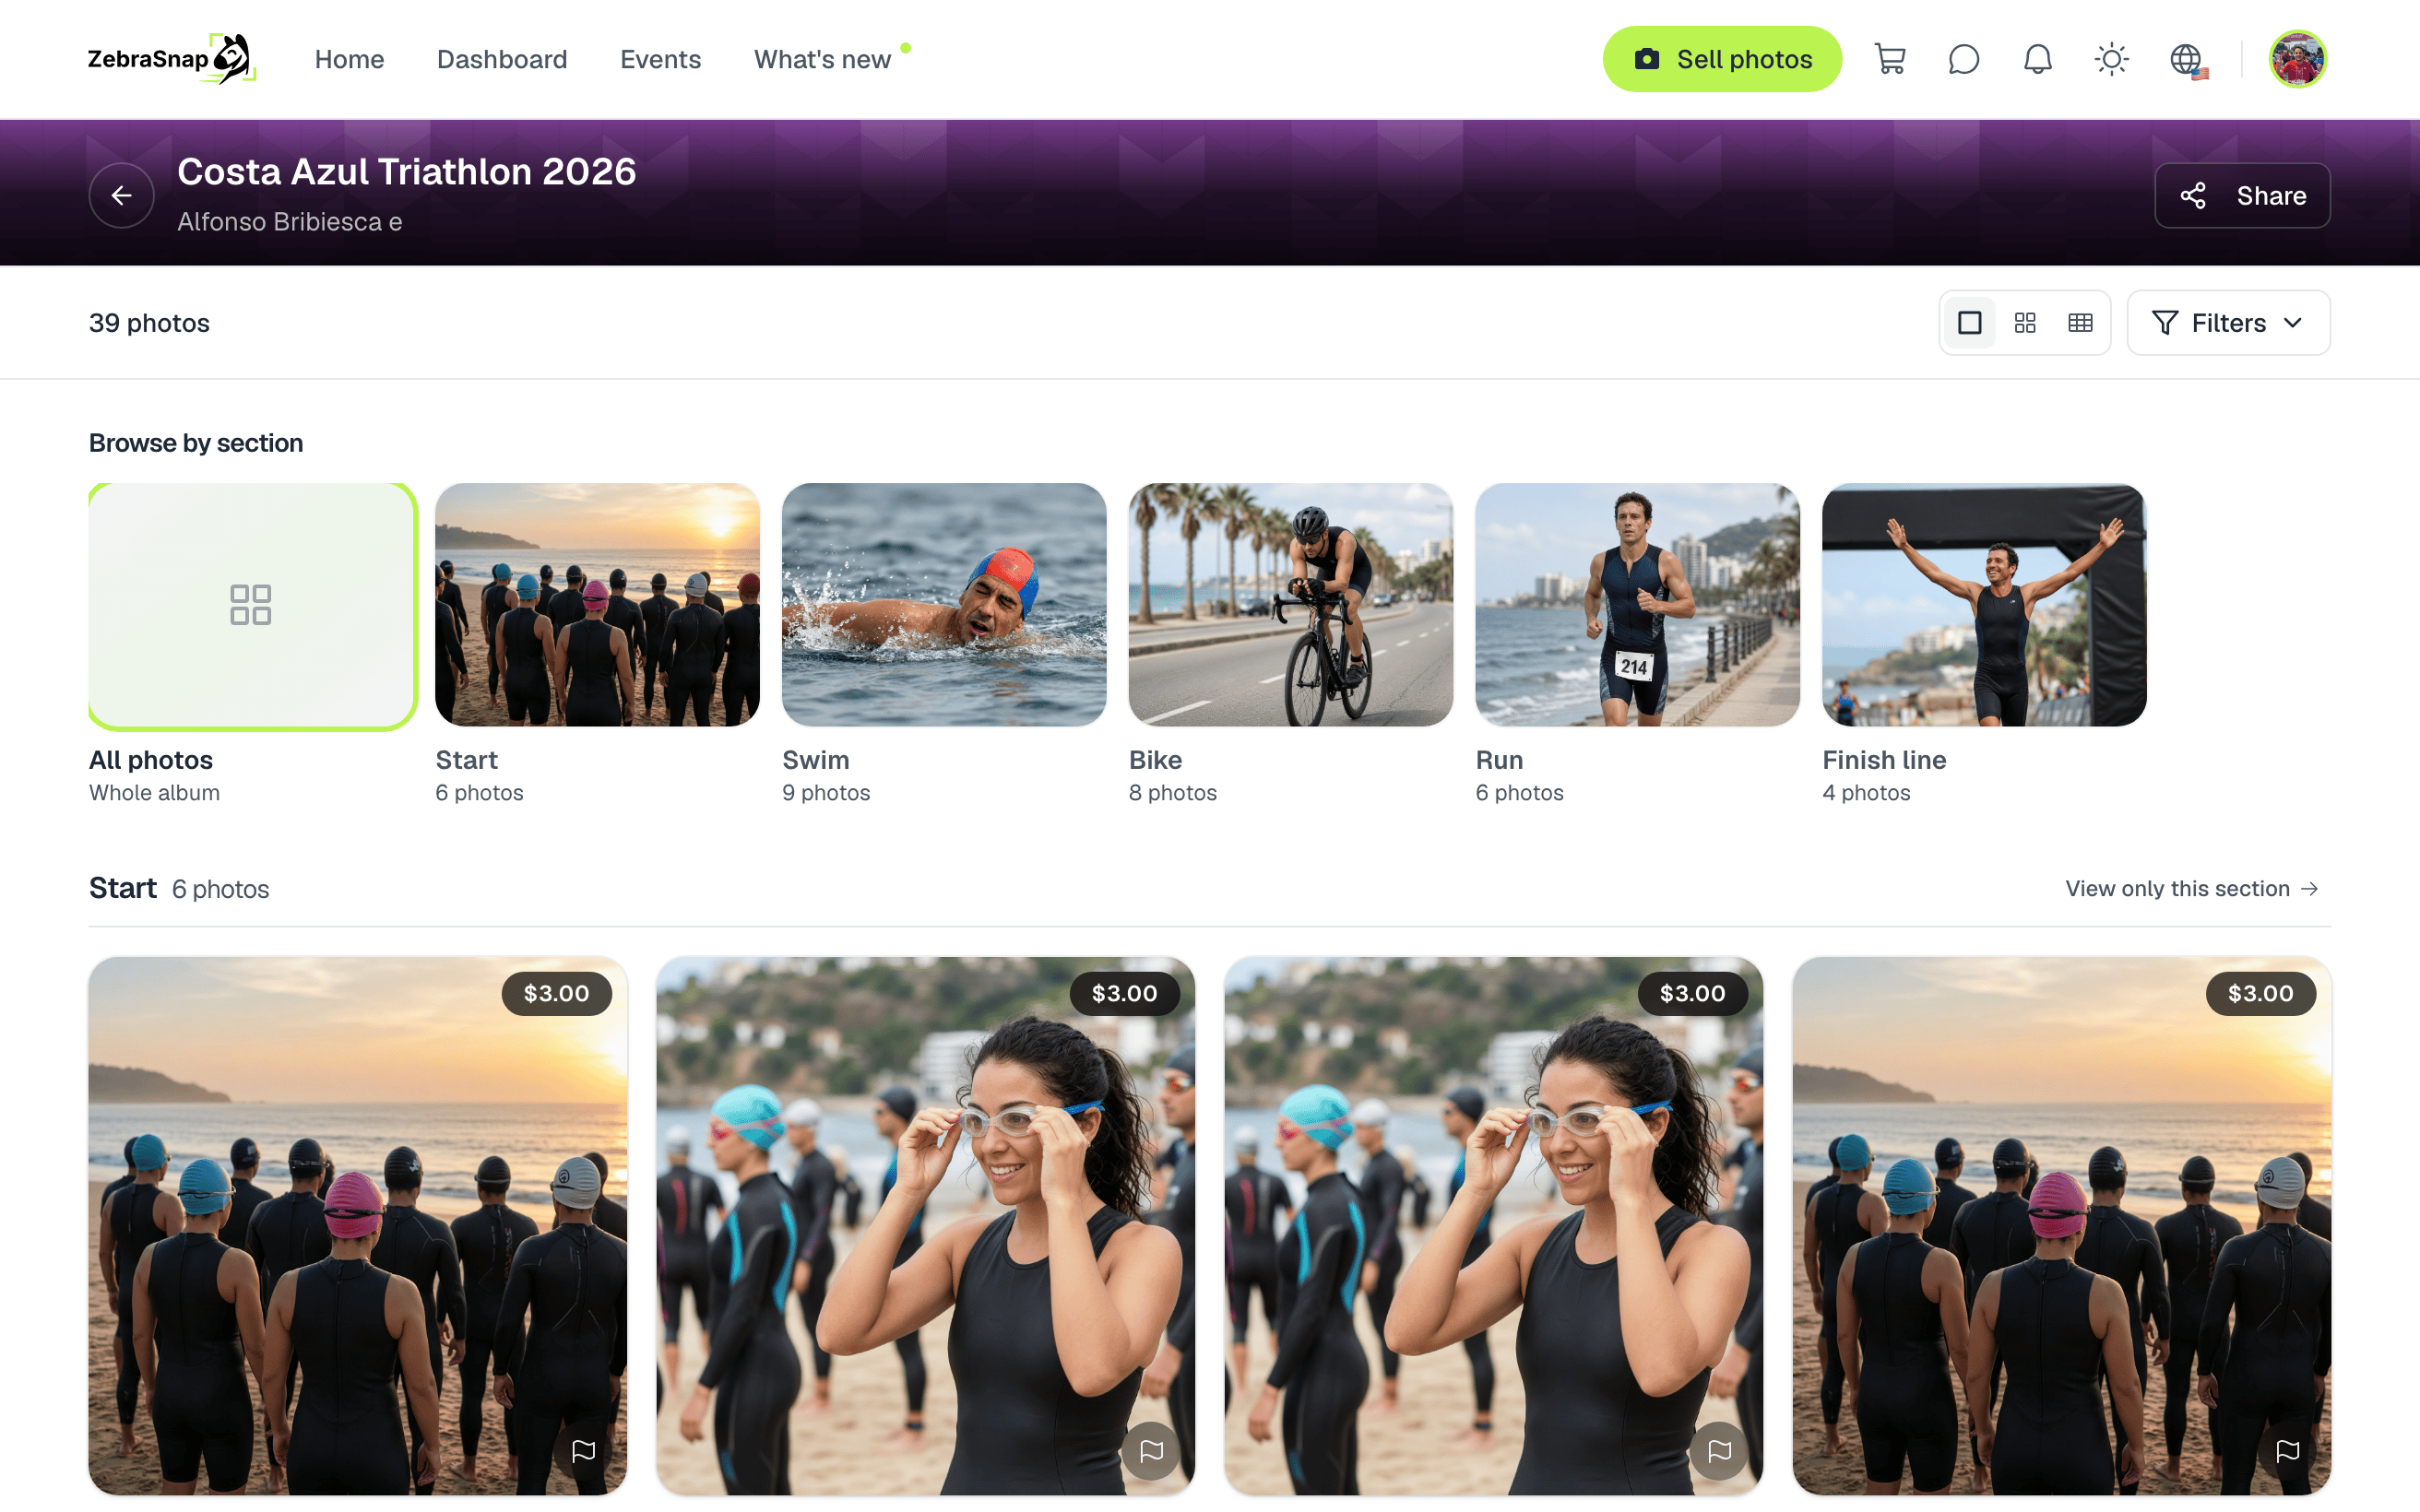
When they browse the whole album, photos are grouped by section in your order, each with a heading, and photos that are not in any section come last under More photos. Empty sections are hidden from buyers.
In albums that only show photos after a selfie, section cards are shown without cover photos, so nobody sees other people's photos before searching.
Tips
- Name sections the way buyers think. "Swim" beats "Block A". Add the spot when it helps: "Bike - Kilometer 20".
- Organize on your computer first, then upload section by section. If you already sort photos into folders before uploading, pick the section and drop the matching folder.
- Keep "Unsorted" empty before publishing, so no photo ends up only in the long list.
The photos in these screenshots are illustrative. Still have questions? Contact us and we'll help.
Still need help?
Can't find what you're looking for? Our team is happy to help.