Help center
Uploading with SFTP - step by step with Cyberduck
The most resilient way to upload big albums, even on flaky connections. What SFTP is, where to find your credentials, and a click-by-click walkthrough with Cyberduck (any SFTP client works).
In short
SFTP is how the pros move thousands of photos: a direct, secure connection between your computer and our servers, the most resilient way to upload big albums. There's no tab to keep open and no upload that dies at 92% - if your connection drops, you just reconnect and pick up where you left off, and it's impossible to duplicate or overwrite photos by accident.
It sounds technical. It isn't. If you can drag files from one folder to another, you can use SFTP - that's literally the whole gesture. The setup takes about ten minutes the first time, and after that every big upload is: open app, connect, drag, walk away.
In this guide we use Cyberduck because it's free and works on Mac and Windows - but any SFTP client works (FileZilla, WinSCP, Transmit, or even a mobile app). The steps are nearly identical everywhere.
What you need
-
An SFTP client. We'll use Cyberduck (free for Mac and Windows).
-
Your album's SFTP credentials. Every album has its own - here's where they live:
Open your album → press Upload → choose SFTP upload. You'll see four values: Server, Port, Username, and Password, each with a copy button.

Heads-up: SFTP is not the same as plain FTP. They're different protocols on different ports. Every client we mention speaks SFTP - just make sure you pick the SFTP (SSH File Transfer Protocol) option when your client asks.
Step 1 - Install Cyberduck
Download Cyberduck from the official site and install it like any other app. Pick the Mac or Windows build - both are free.
Step 2 - Connect to your album
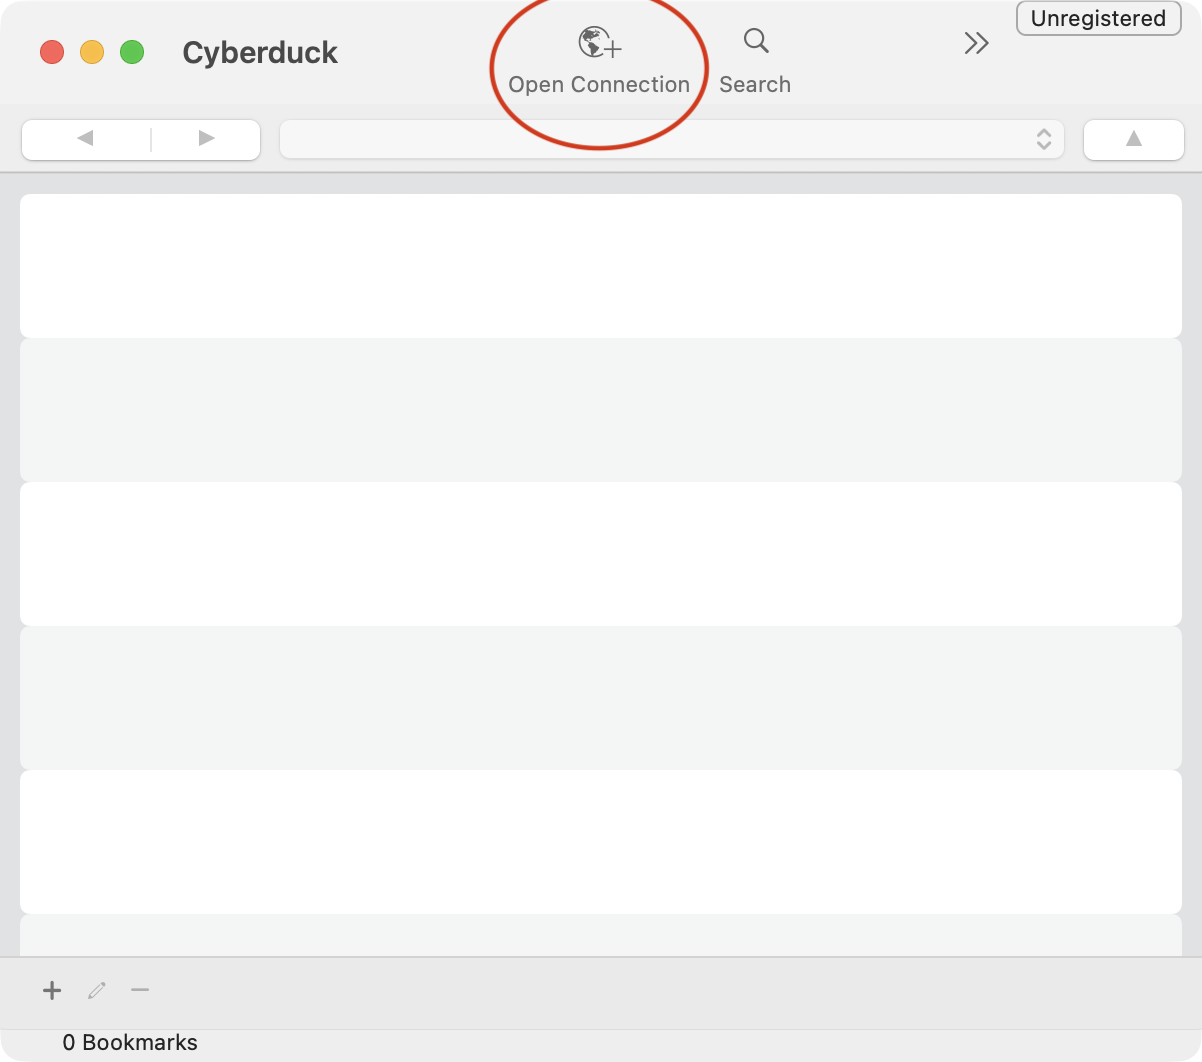
Open Cyberduck and click Open Connection in the top-left corner.
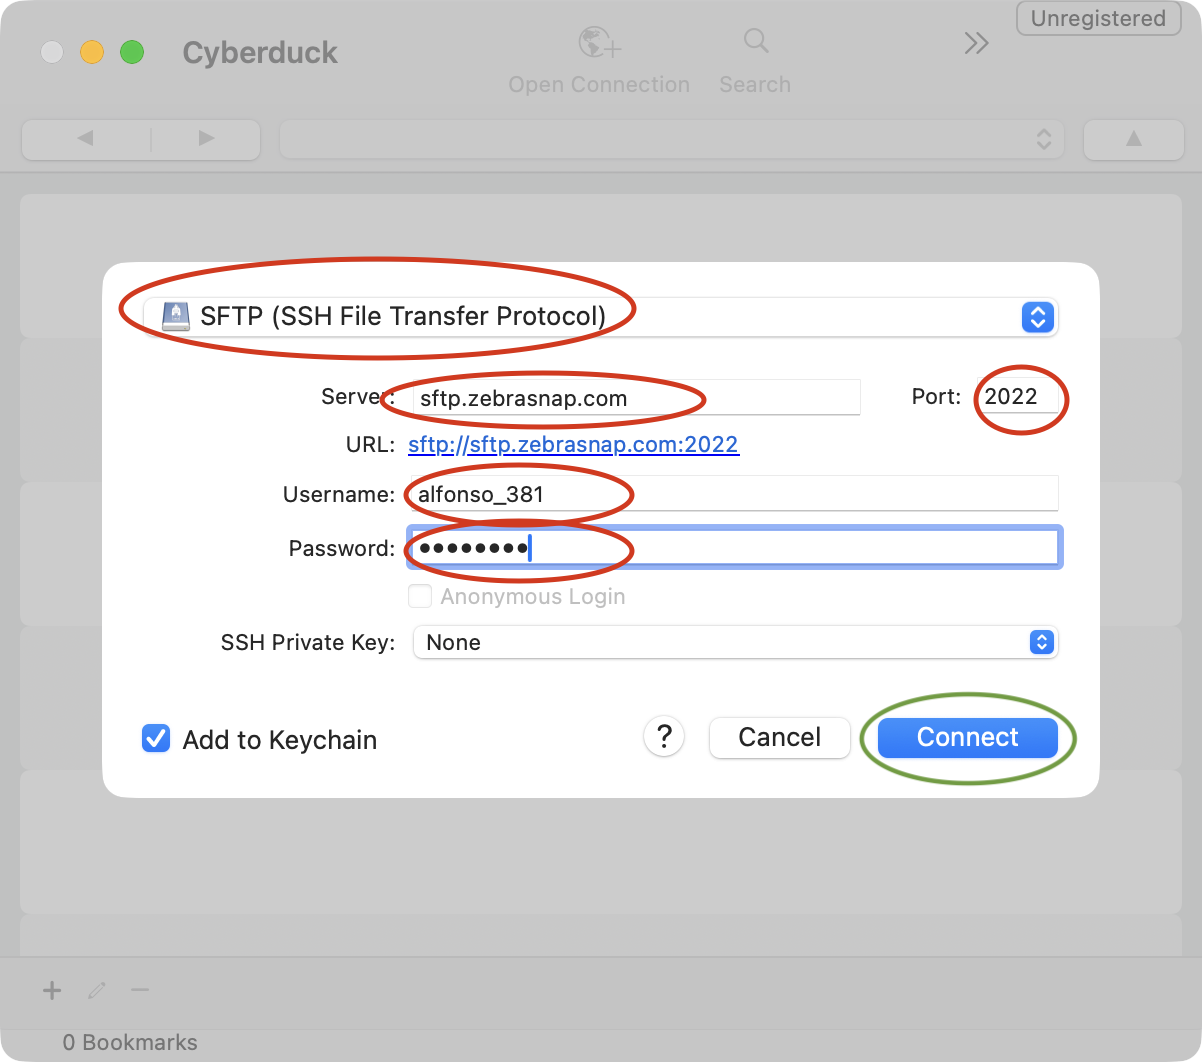
A connection dialog opens. At the very top, pick SFTP (SSH File Transfer Protocol) from the dropdown - this is the most important step. Then copy each value from ZebraSnap's SFTP tab into the matching field:
| Cyberduck field | What to paste |
|---|---|
| Server | the Server value (e.g. sftp.zebrasnap.com) |
| Port | the Port value |
| Username | the Username value |
| Password | the Password value (use the copy button - it avoids typos) |
Leave Add to Keychain checked so Cyberduck remembers it next time, then press Connect.
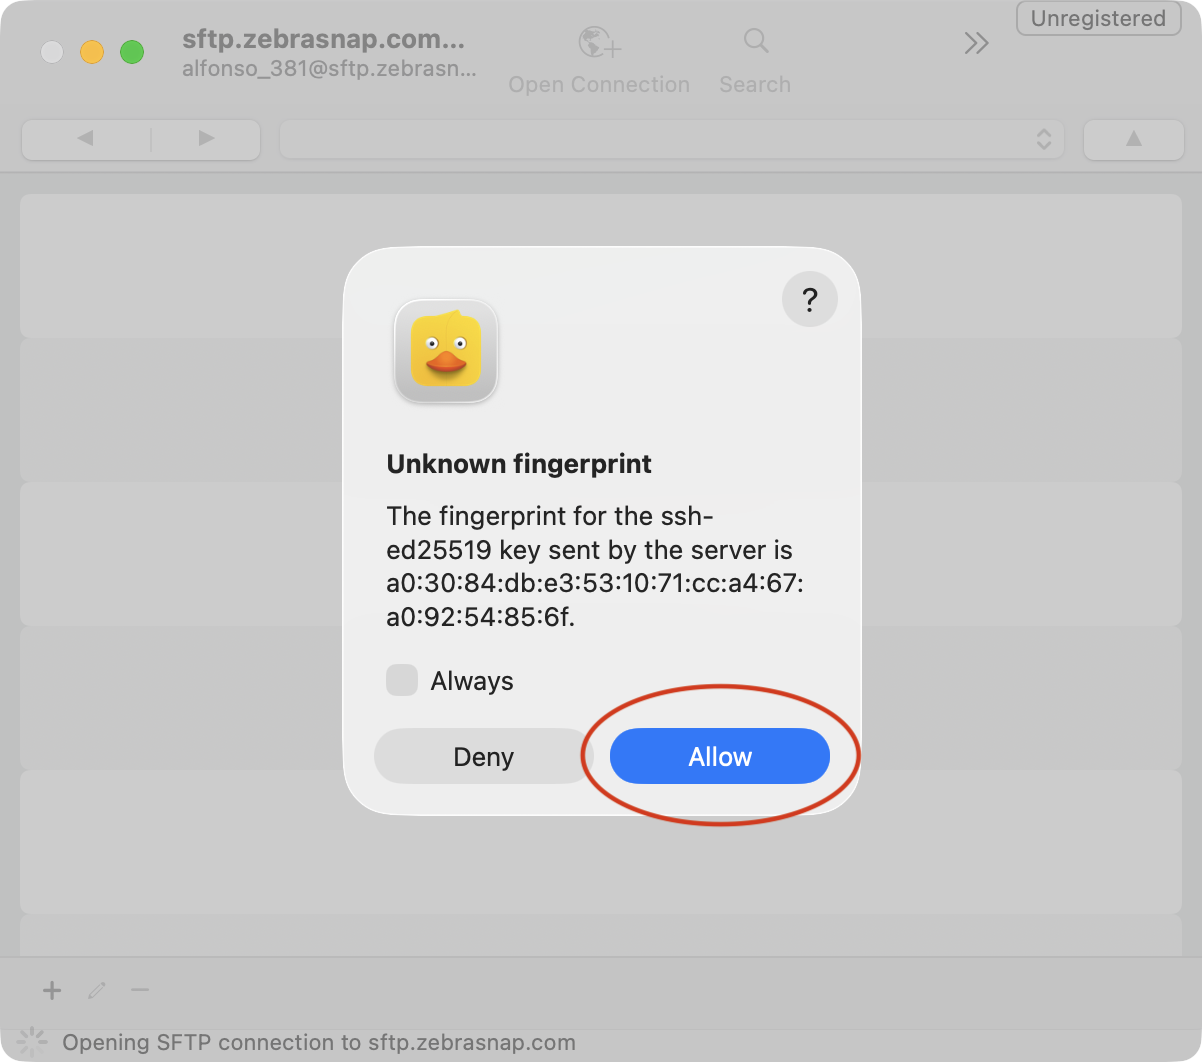
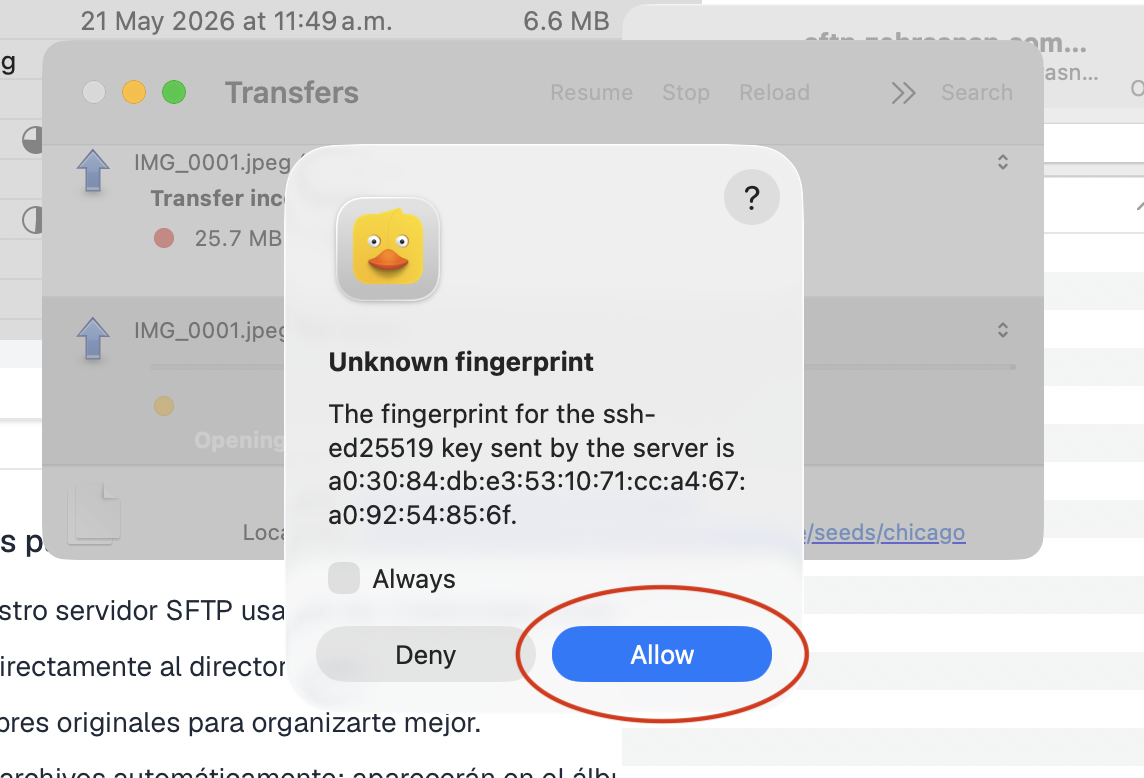
The first time you connect, Cyberduck shows an "Unknown fingerprint" window - that's normal for any new server. Check Always and press Allow.
When the connection works, Cyberduck shows the album's (empty) remote folder.
Step 3 - Upload your photos
Cyberduck shows a single pane: the ZebraSnap server - this is your album. Leave it at the root folder, that's exactly where files should go.
Open the folder with your photos in Finder (Mac) or File Explorer (Windows), select them (Cmd+A / Ctrl+A selects everything), and drag them into the Cyberduck window. That's the upload.
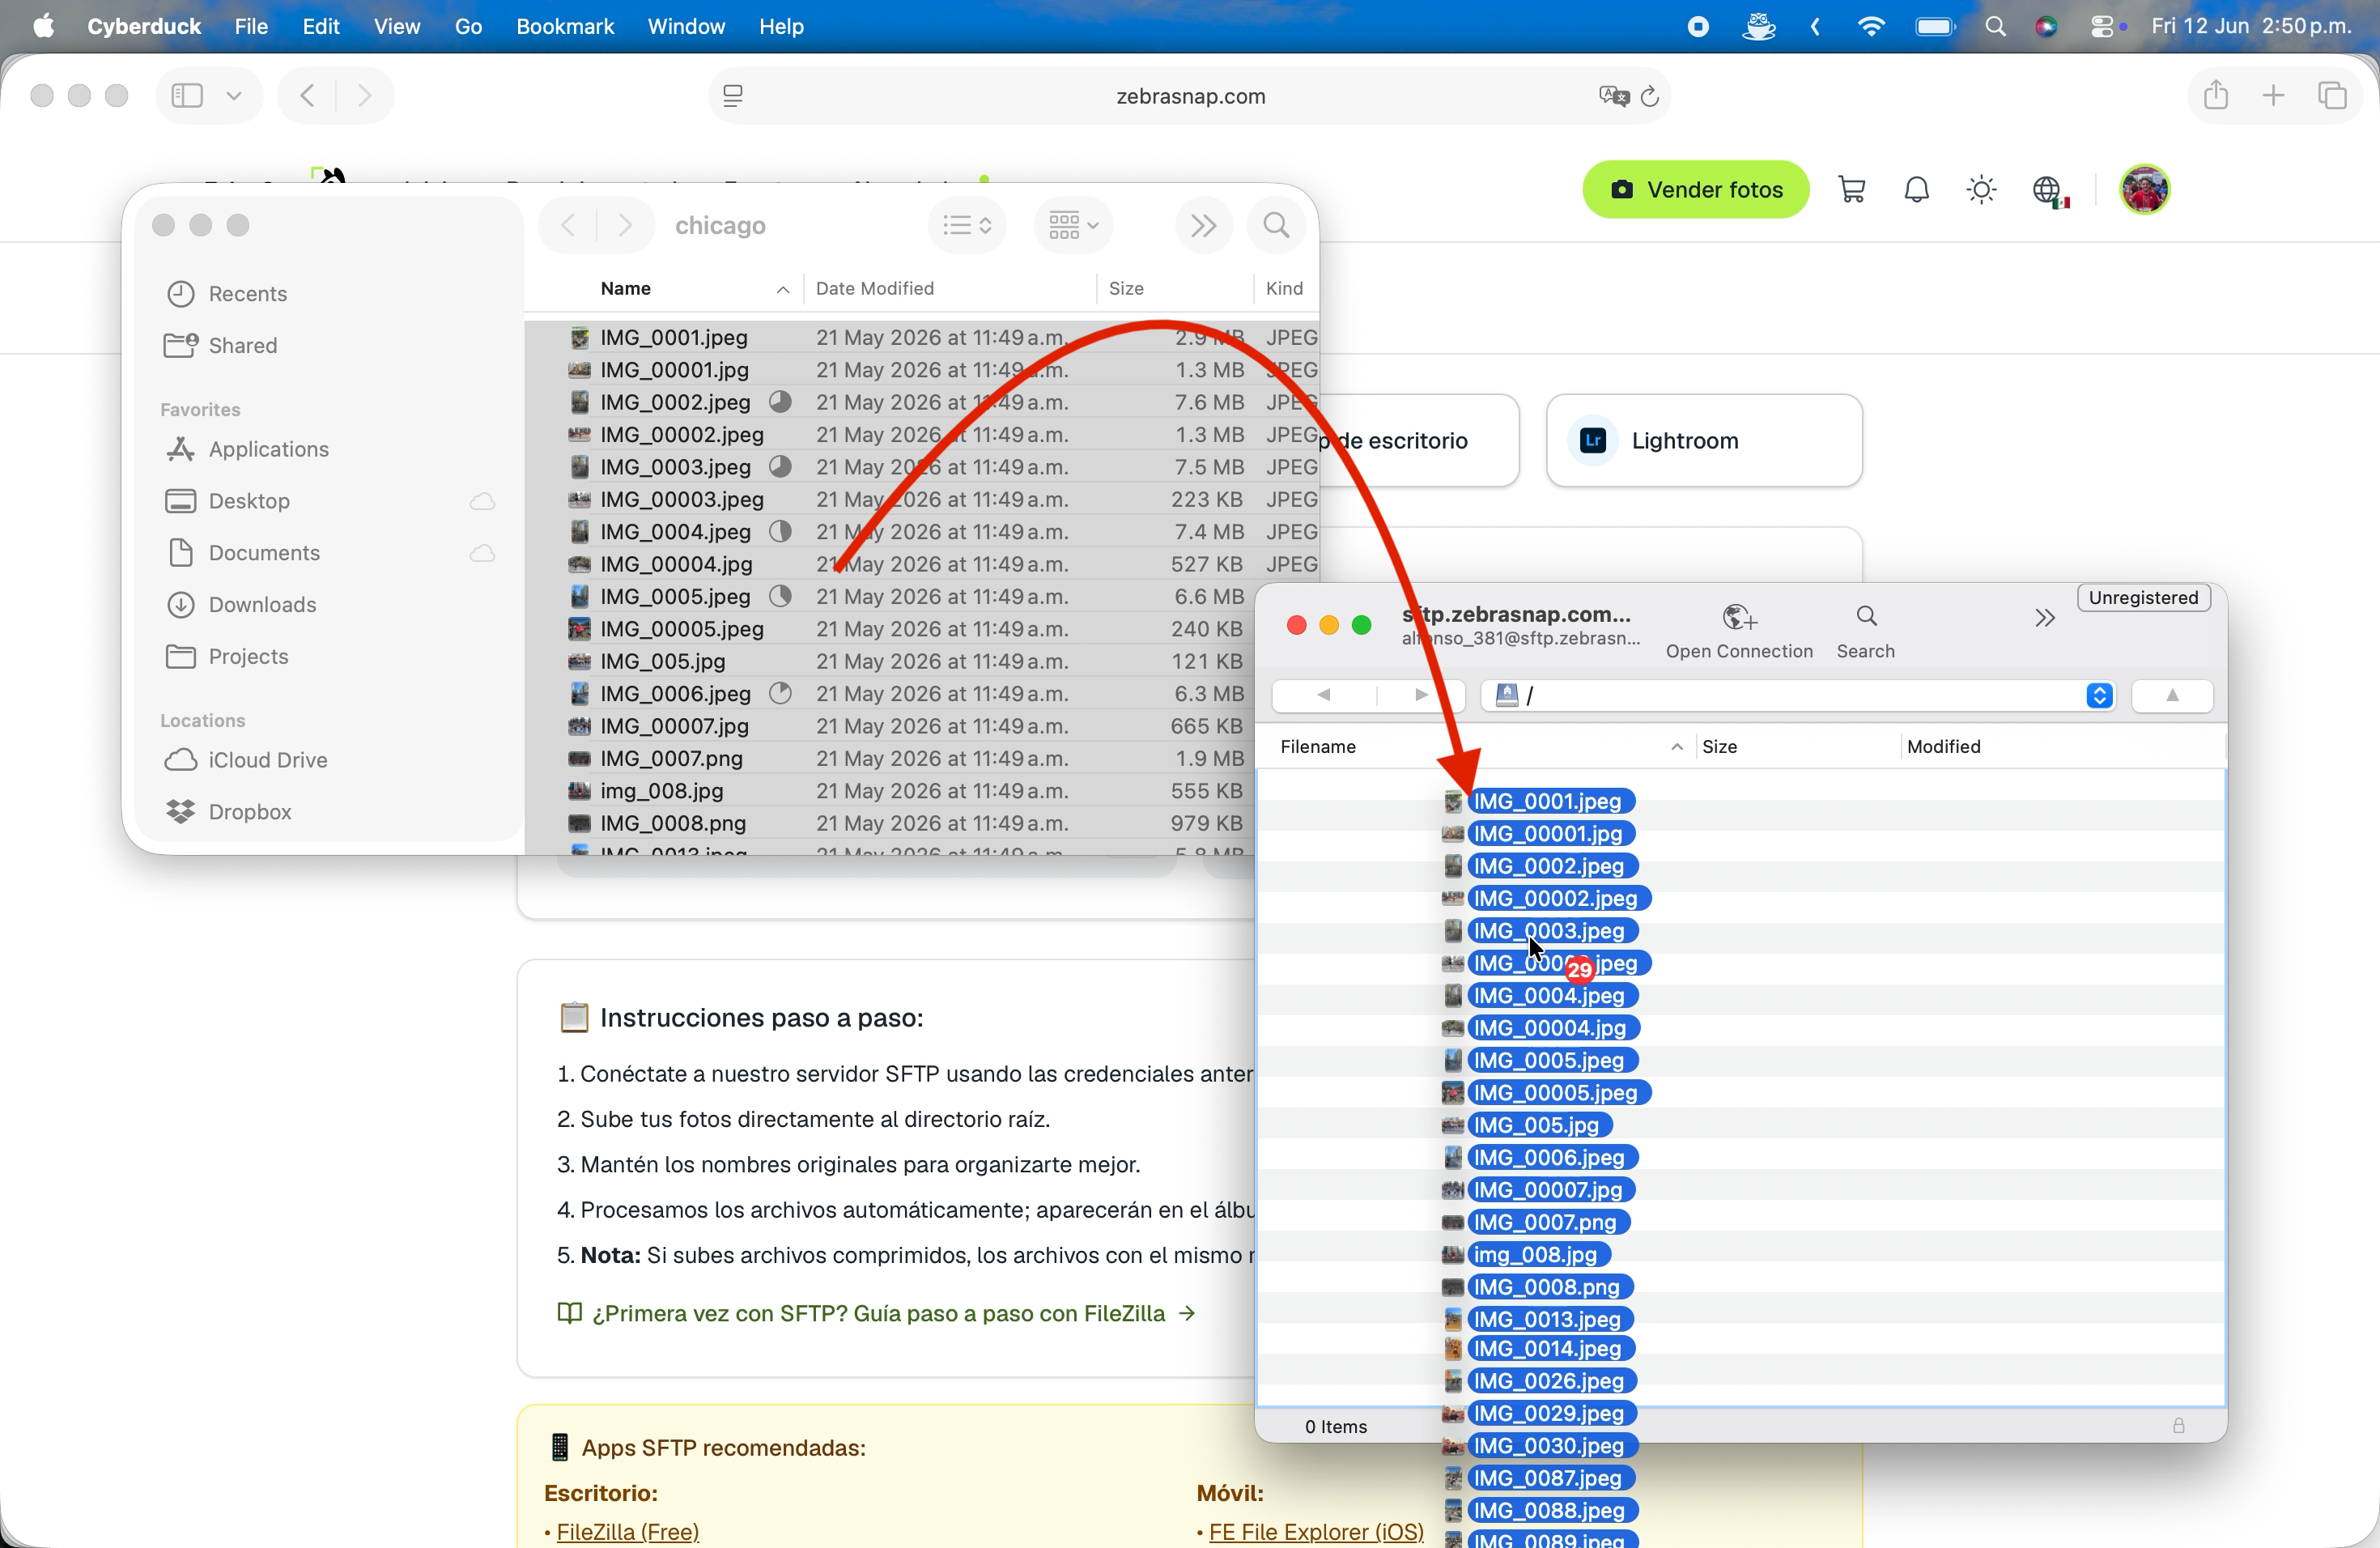
A Transfers window opens showing the queue: how many files are waiting, transferring, and done. The first time it may ask about the fingerprint again - press Allow. You can keep using your computer - Cyberduck works through the queue on its own.
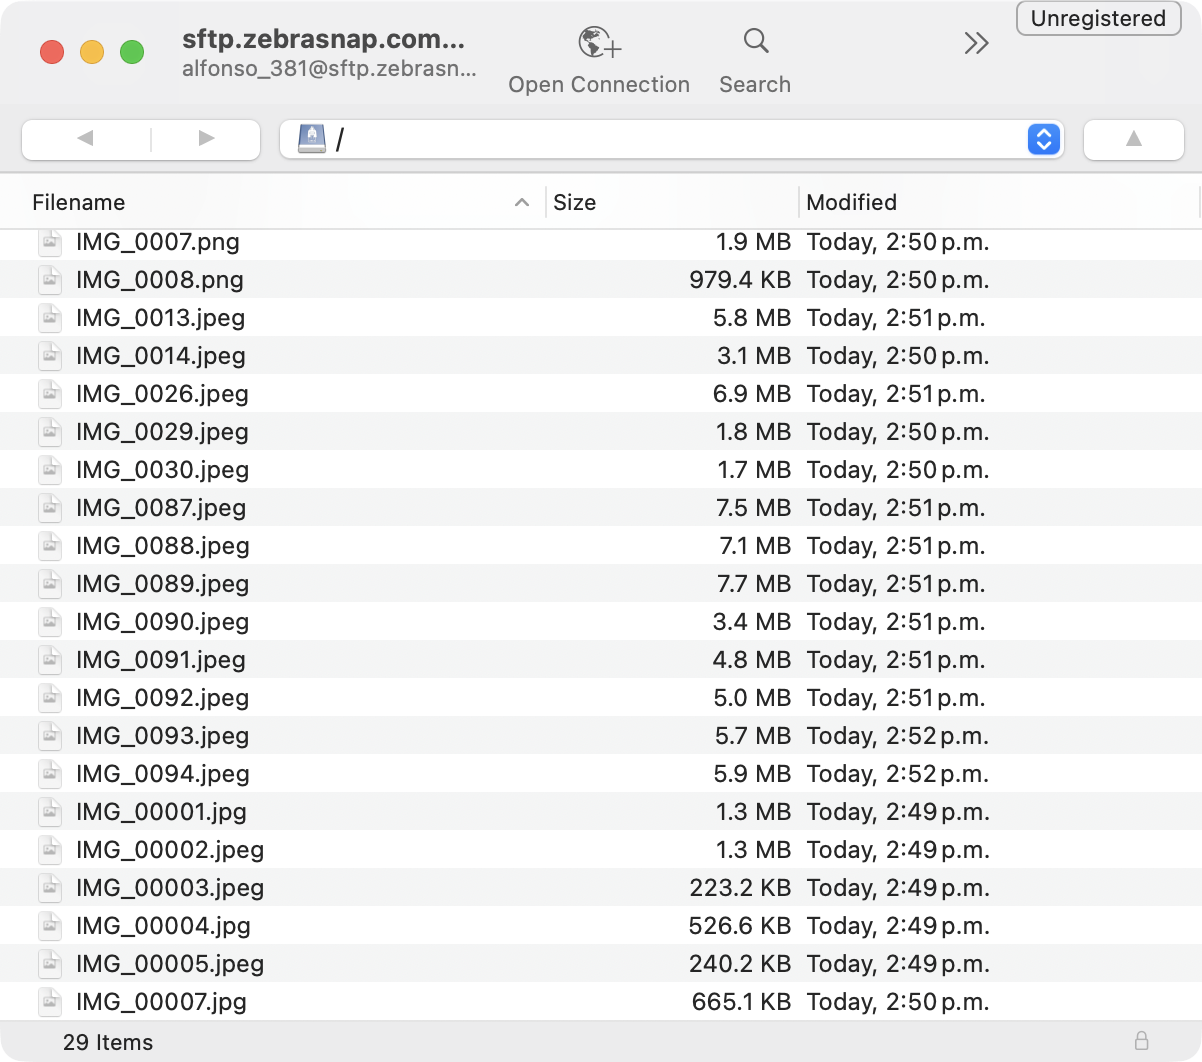
When the queue empties, the album folder lists everything you sent.
A few tips while it runs:
- Keep original filenames. If a photo with the same name is already in your album, ZebraSnap won't upload it again - so you can't accidentally create duplicates, and re-running an upload only sends what's missing.
- Connection dropped? Reconnect (Open Connection again, or pick it from your bookmarks) and re-drag the folder. Files that already arrived are skipped - they won't upload twice, so nothing is duplicated and only the missing ones go up. Cyberduck can also retry failed transfers from the Transfers window - select the failed item → Reload.
- You can also upload compressed files (ZIP, 7Z, RAR…) over SFTP and we'll unpack them, the same as on the web.
Step 4 - There is no step 4
Done. As soon as files arrive, ZebraSnap processes them automatically - previews, watermarks, face and bib recognition - and they appear in your album within a few minutes. You don't need to go back to the website to "confirm" anything, and you can close Cyberduck whenever the queue is empty.
Troubleshooting
"Authentication failed" / wrong password. Copy-paste the credentials with the copy buttons instead of typing. Make sure you're using the credentials of the right album - each album has its own.
"Connection refused" or it hangs. Double-check the Port field matches the port shown in ZebraSnap, and that you picked SFTP, not FTP. On some office/hotel networks the SFTP port is blocked - try another network or a phone hotspot to confirm.
Photos uploaded but don't appear. Give it a few minutes - big batches take longer to process. They appear in the album automatically; there's nothing else to press.
Want a different app? All of these work great with the same credentials:
- Desktop: Cyberduck (free, Mac/Windows), FileZilla (free, all platforms), WinSCP (Windows)
- Mobile: FE File Explorer (iOS), Total Commander (Android), Termius (iOS/Android)
All upload methods
SFTP is one of four ways to upload. See How to upload photos: all the ways, explained - or, if SFTP isn't your thing, the desktop app gives you most of the reliability with none of the setup.
Related articles
- How to upload photos: all the ways, explainedZebraSnap gives you four ways to upload: the web, SFTP, the desktop app, and Lightroom. Which one to pick, what files we accept, and tips for big albums.
- Uploading from the web (Photos & files)The fastest way to get started: drag photos, ZIPs, or videos into your browser and ZebraSnap handles the rest. Step by step, plus what to do when something fails.
- Uploading with the ZebraSnap desktop appA native app for Mac and Windows that uploads thousands of photos with automatic retry, resume, and parallel transfers - no setup, no browser tab.
Still need help?
Can't find what you're looking for? Our team is happy to help.