Photography
Real Tips for Taking Better Sports Photos
Set up your camera for sports: shutter speed, continuous autofocus, ISO, burst mode and a starter configuration that works at any event.
Taking good sports photos isn't just about owning an expensive camera. It's about understanding movement, anticipating the action, configuring your camera correctly, and being in the right spot before the key moment happens.
This guide is for photographers who want to get better at events: road races, triathlons, soccer, cycling, track and field, basketball, tennis, school sports or local competitions. It isn't trying to sound complicated. The goal is for you to walk away with practical settings and clear judgment calls.
1. Understand what makes sports photography hard
A lot is happening at once in a sports photo:
- The subject moves fast.
- The distance is constantly changing.
- Light can vary a lot.
- People cross in front of you.
- The best moment lasts less than a second.
- Most of the time you can't redo the scene.
So the goal isn't "shoot a lot and see what comes out." The goal is to set up the camera so it responds quickly, and to position yourself where the action is most likely to happen.
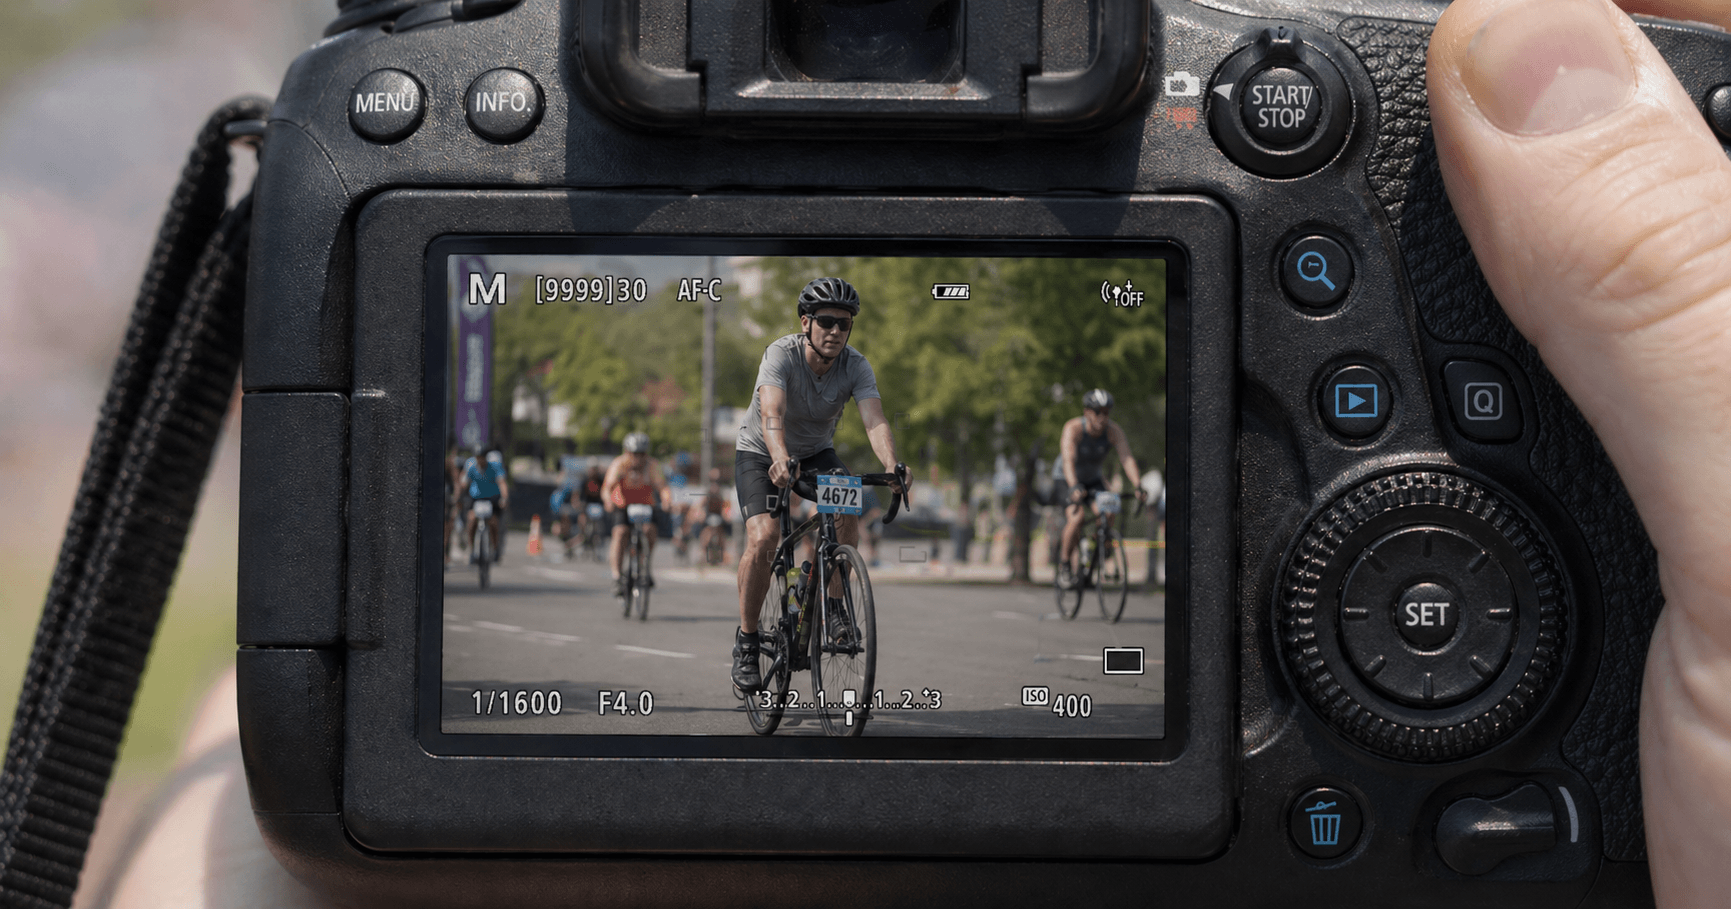
2. The most important setting: shutter speed
Shutter speed controls how long light hits the sensor. In sports, it also controls whether motion comes out frozen or blurred.
To freeze fast action, several specialist guides recommend working around 1/1000 s or faster, and for high-speed sports it can be worth pushing to 1/1600 s or 1/2000 s. Brands like Nikon recommend pairing this with continuous autofocus, and Canon's guides reference speeds like 1/1600 s in many sports scenarios.
Practical shutter speed presets
| Situation | Suggested speed |
|---|---|
| Kids running, recreational sport | 1/500 s to 1/1000 s |
| Running, soccer, basketball, tennis | 1/1000 s to 1/1600 s |
| Cycling, fast track events, triathlon bike leg | 1/1600 s to 1/2500 s |
| Jumps, sprints, very fast action | 1/2000 s or faster |
| Creative panning with motion blur | 1/30 s to 1/125 s |
If your photos come out blurry even though focus is right, the speed is probably too slow.
3. Use continuous autofocus, not single-shot
For sports, you should almost always use continuous autofocus.
Depending on the brand, it's called:
- Canon: AI Servo AF / Servo AF
- Nikon: AF-C
- Sony: AF-C
- Fuji: AF-C
- Other systems: Continuous AF
Continuous autofocus tries to track the subject as it moves. It really pays off when you shoot bursts, because the camera recalculates the subject's position between frames.
When to use continuous AF
Use it for:
- Runners coming toward you.
- Cyclists passing sideways.
- Players changing direction.
- Kids running around a court.
- Jumps, spikes, passes, slides or finish-line crossings.
When it isn't really needed
You can use single-shot AF if the subject is still:
- Portrait after the race.
- Posed team photo.
- Podium.
- Detail shots of medals, shoes, bikes or gear.
4. Don't use every focus point all the time
Many modern cameras include face, eye, body, animal, vehicle or sports-subject detection. That helps a lot, but it isn't always smart to let the camera decide everything.
In sports with many athletes, if you use the entire focus area, the camera may lock onto the wrong person: someone crossing, a referee, another runner or a spectator.
Practical recommendation
Start with these options:
- A small single point: for individual subjects.
- Small or medium zone: for fast action where holding an exact point is hard.
- Subject tracking: if your camera does it well and there isn't too much crossing traffic.
- Eye/face detection: great for running, head-on cycling, sports portraits and any scene where the face is clearly visible.
To start, a small zone in the center is usually easier than a single point, because it leaves margin if the athlete moves slightly.
5. Try back button focus
Back button focus separates focusing from the shutter button. Instead of focusing when you half-press the shutter, you focus with a rear button such as AF-ON.
Both Canon and Nikon document this approach: it lets you trigger autofocus from a rear button, leaving the shutter mostly for taking the picture.
Why it helps in sports
It lets you:
- Keep an athlete in focus while you track them.
- Stop refocusing without changing settings.
- Recompose with more control.
- Avoid the camera refocusing right at the moment of the shot.
Important
It isn't mandatory. If you're just starting out, master these first:
- Fast shutter speed.
- Continuous autofocus.
- Burst mode.
- Good positioning.
Then try back button focus. It can feel weird at first.
6. Use burst, but don't shoot mindlessly
Burst mode helps because many gestures last only milliseconds: the foot in the air, the ball leaving the foot, the peak of a jump, the smile crossing the finish line.
But endless bursts have downsides:
- You fill cards fast.
- You wear the camera more.
- Culling becomes painful.
- You end up with thousands of nearly identical frames.
Better way to use burst
Shoot in short bursts:
- 3 to 6 frames as the athlete enters the good zone.
- Another burst at the key moment.
- Release the shutter once the action is over.
Think of it as recording very short clips, not as gluing your finger to the shutter.
7. Learn to embrace ISO
In sports you often need a fast shutter speed. To get there, the camera needs enough light. If there isn't, you have three options:
- Open the aperture more.
- Raise the ISO.
- Lower the shutter speed.
In sports it's almost always better to raise ISO than to drop shutter speed, because a slightly noisy photo can still be useful, but a motion-blurred one usually isn't.
Exposure depends on the balance between aperture, shutter speed and ISO: change one and you'll likely have to adjust another to keep exposure consistent.
Rule of thumb
Prefer this:
Sharp photo at high ISO over clean photo that is blurred
Useful ISO ranges
| Light | Approximate ISO |
|---|---|
| Bright sun | ISO 100-400 |
| Overcast | ISO 400-1000 |
| Sunset | ISO 800-3200 |
| Indoor court or gym | ISO 1600-6400 or higher |
| Low-light night | High ISO, depending on camera |
Every camera handles noise differently. Test yours so you know how far you're comfortable pushing it.
8. Use a wide aperture, but carefully
Aperture controls how much light enters and how blurred the background is.
For sports, common wide apertures are:
- f/2.8
- f/3.5
- f/4
- f/5.6
A wide aperture helps you:
- Let in more light.
- Separate the athlete from the background.
- Get more professional-looking photos.
But it also reduces depth of field. That means a small focusing miss can leave the photo soft.
Practical recommendation
- Single athlete: f/2.8 to f/4 works very well.
- Groups or teams: f/5.6 to f/8 is safer.
- Races with multiple runners on different planes: f/4 to f/5.6 is a good balance.
- Low light: open up as much as you can, but check that focus is consistent.
9. Manual, shutter priority or aperture priority
You don't have to shoot full manual all the time. What matters is controlling what matters.
Option 1: Shutter priority
On Canon it's usually Tv. On Nikon/Sony/Fuji it's usually S.
You pick the speed, e.g. 1/1600 s, and the camera picks the aperture.
A good place to start because it guarantees the action won't come out blurred.
Option 2: Manual with auto ISO
You pick:
- Shutter: e.g. 1/1600 s.
- Aperture: e.g. f/2.8 or f/4.
- ISO: auto, the camera adapts to the light.
This is one of the most useful sports configurations because you keep creative control while the camera adapts to changing light.
Option 3: Full manual
You control shutter, aperture and ISO.
It's ideal when light is constant:
- Lit stadium.
- Gym with stable lighting.
- Race finish line with fixed exposure.
- Court without strong sun-and-shadow shifts.
But if there's sun, shade, clouds and constant motion, full manual can cost you shots if you're not adjusting fast.
10. Recommended starter configuration
If you don't know what to set, start here.
Outdoor daytime sports
Mode: Manual + Auto ISO
Shutter: 1/1600 s
Aperture: f/2.8 to f/5.6
ISO: Auto
Focus: AF-C / Servo AF
Focus area: small zone or tracking
Burst: high or medium
Format: RAW or RAW + JPEG
White balance: Auto
From there, adjust based on the kind of event, the light, and what you're seeing on the back of the camera.
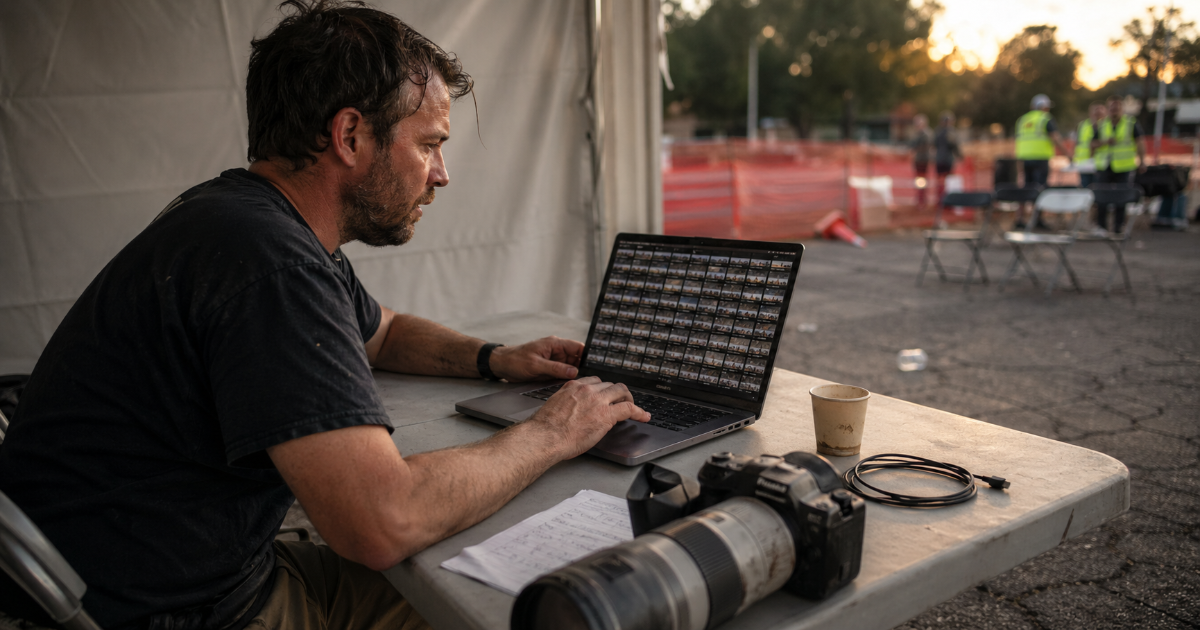
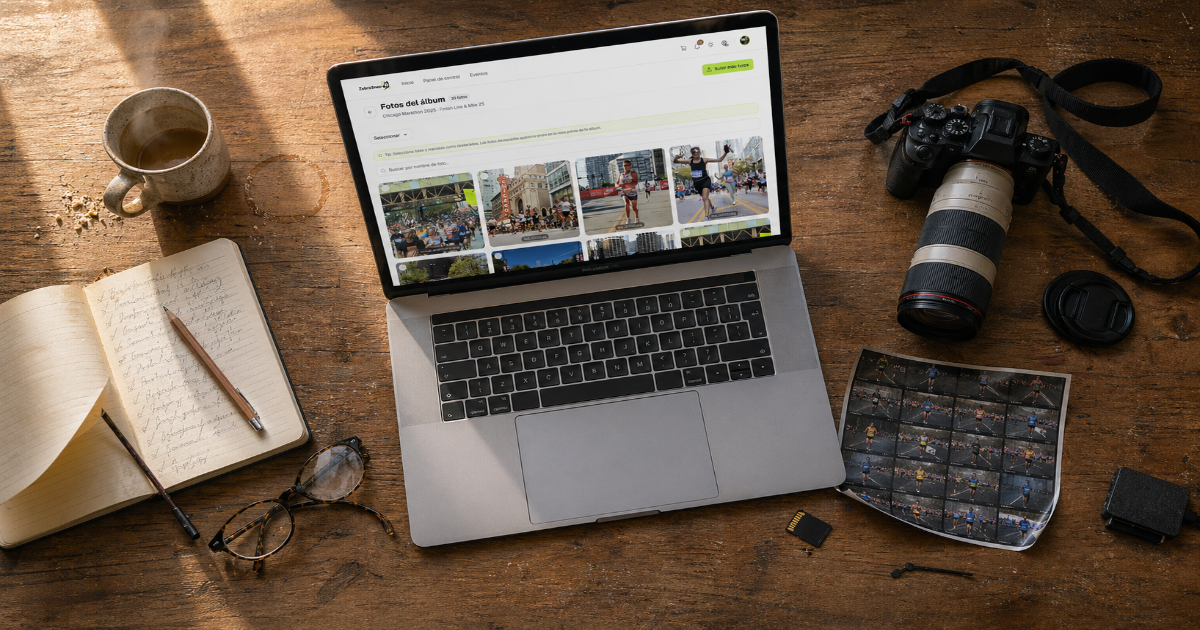
After the event: workflow matters as much as the shots
Shooting well is half the job. The other half is processing, organizing and getting the photos to athletes (or their families) quickly, while the emotion of the event is still fresh.
A few practical tips:
- Cull first, edit later. Mark rejects before you spend time developing.
- Use presets for similar conditions. One preset per type of light (sun, shade, gym) saves hours.
- Lean on AI for tagging. Bib detection and face recognition turn thousands of frames into a searchable gallery, and athletes find their photos in seconds.
- Deliver fast. Photos sell better in the first few days after the event.
That's exactly what we focus on at ZebraSnap: you upload your photos and the platform takes care of AI tagging, search and selling, so you can spend your time shooting instead of sorting files.
To wrap up
Sports photography improves when you stop fighting the camera and start anticipating the action. Fast shutter, continuous autofocus, short bursts, and a focus point you control are the foundation.
Start with the recommended setup, shoot a lot, review what worked and what didn't, and come back to the next event with a clearer idea of where to position yourself. Every race, match or meet is another chance to sharpen your eye.
Found this useful? Share it.
Keep reading
More on the same topic
Photography
How to Choose a Photo Sales Platform for Triathlons, HYROX, and Road Races
April 3, 2026 · 7 min read
Photography
5 Reasons Photographers Choose ZebraSnap to Sell Their Photos
July 15, 2025 · 3 min read
Photography
How Amateur Photographers Can Earn Extra Money with Their Phone at Sports Events
July 15, 2025 · 4 min read